Unlocking Your Clothing Donation Value
Donating clothes does more than just clear out closet space—it can actually lower your tax bill in a meaningful way. But here’s the secret most people miss: the clothing donation value isn’t what you paid for the items. It’s their Fair Market Value (FMV) at the time of donation, and getting that right is the key to maximizing your deduction legally and with total confidence.
The Real Value Hiding in Your Donated Clothes
We’ve all been there. You clean out your closet, fill a few bags, and drop them off at a local charity. They hand you a blank receipt, you scribble a rough guess—maybe $100 or $200—and hope for the best when tax season rolls around. It’s a common routine, but it’s one that leaves a ton of money on the table and opens you up to unnecessary risk if the IRS ever comes knocking.
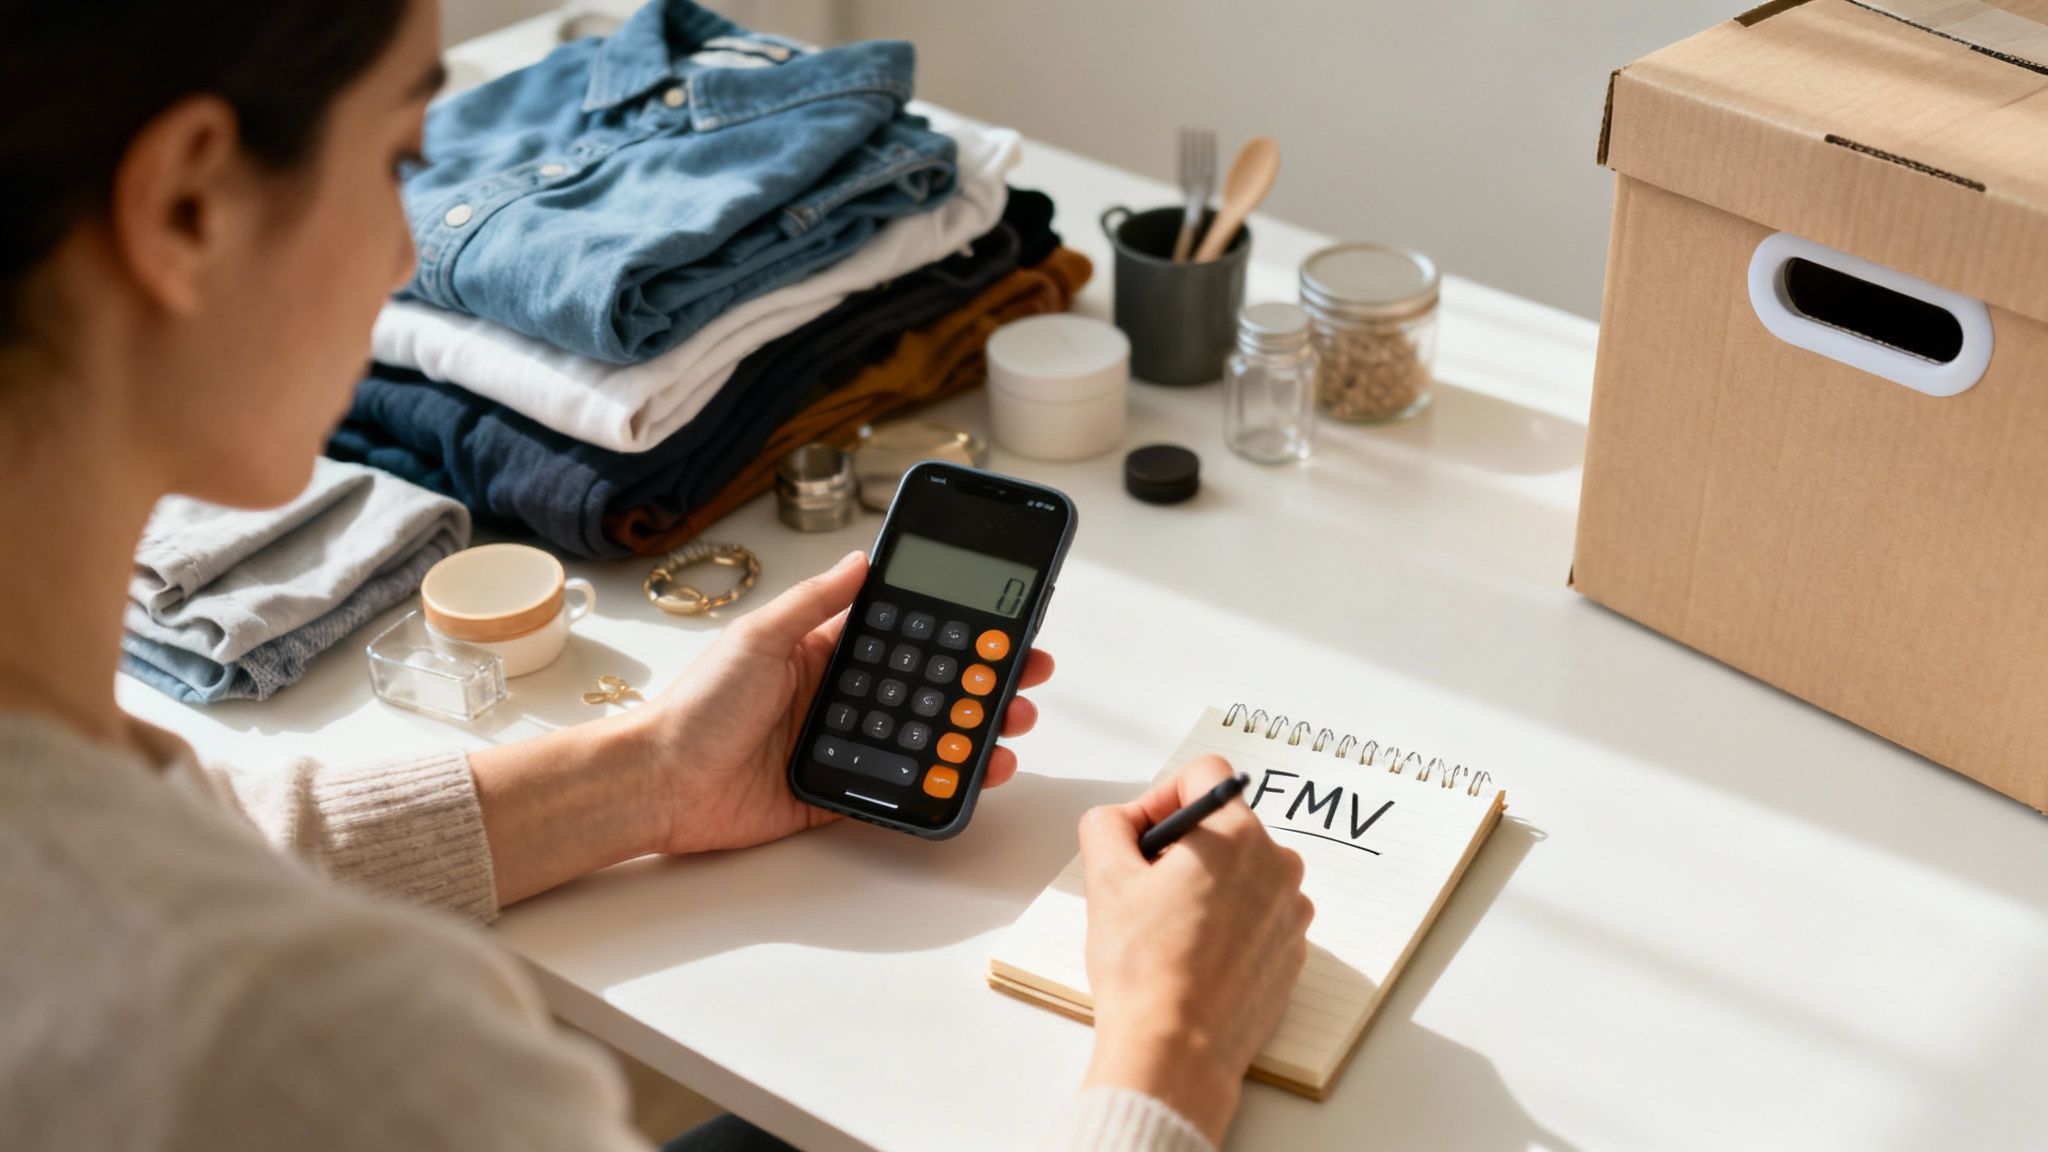
The true value of your donation is a real financial calculation, not just a feel-good gesture. Every single shirt, pair of jeans, and winter coat has a specific worth that can translate into a real tax benefit. The IRS has very clear rules about how this value is determined and, just as importantly, how it’s documented. Trust me, guessing a round number for a trash bag full of clothes just won’t cut it.
Shifting Your Mindset to Maximize Your Giving
To turn your charitable giving into a smart financial move, you have to start thinking differently. It’s not about just getting rid of old stuff; it’s about building a solid case for a legitimate tax deduction. That means you need to get organized, pay attention to the details, and understand what actually gives your used items value.
Unlocking the full potential of your deduction involves more than a quick drop-off. You need a game plan.
- Valuing Items Accurately: This means learning how to assign a realistic Fair Market Value to each individual item based on its condition, brand, and what someone would actually pay for it today.
- Creating Detailed Records: The IRS requires an itemized list for any non-cash donation over $500. This is non-negotiable.
- Gathering Solid Proof: You need the right paperwork, like a dated receipt from the charity. Taking photos of your items before you donate is an even better way to back up your claims.
Think of your donations with the same seriousness you’d apply to any other financial transaction. When you do, you ensure you get every penny of the tax credit you deserve while supporting the causes you believe in. This organized approach is the bedrock of a well-supported deduction.
The Path to a Confident Deduction
This guide is going to walk you through everything you need to know about clothing donation value, step by step. We’ll break down the confusing IRS rules into simple, actionable advice. You’ll learn how to assess your items like a pro, create a perfect paper trail, and sidestep the common mistakes that trip up so many taxpayers.
DeductAble makes this whole process incredibly simple, letting you create detailed, itemized lists right from your phone. But whether you use a dedicated app or a simple spreadsheet, the core principles are the same.
A great first step is understanding the bigger picture of charitable giving. You can learn more about what donations are tax deductible to see how your clothing fits into the overall strategy. By the time you’re done with this guide, you’ll be ready to turn that pile of clutter into a well-documented, valuable tax deduction.
Decoding Fair Market Value for Your Donations
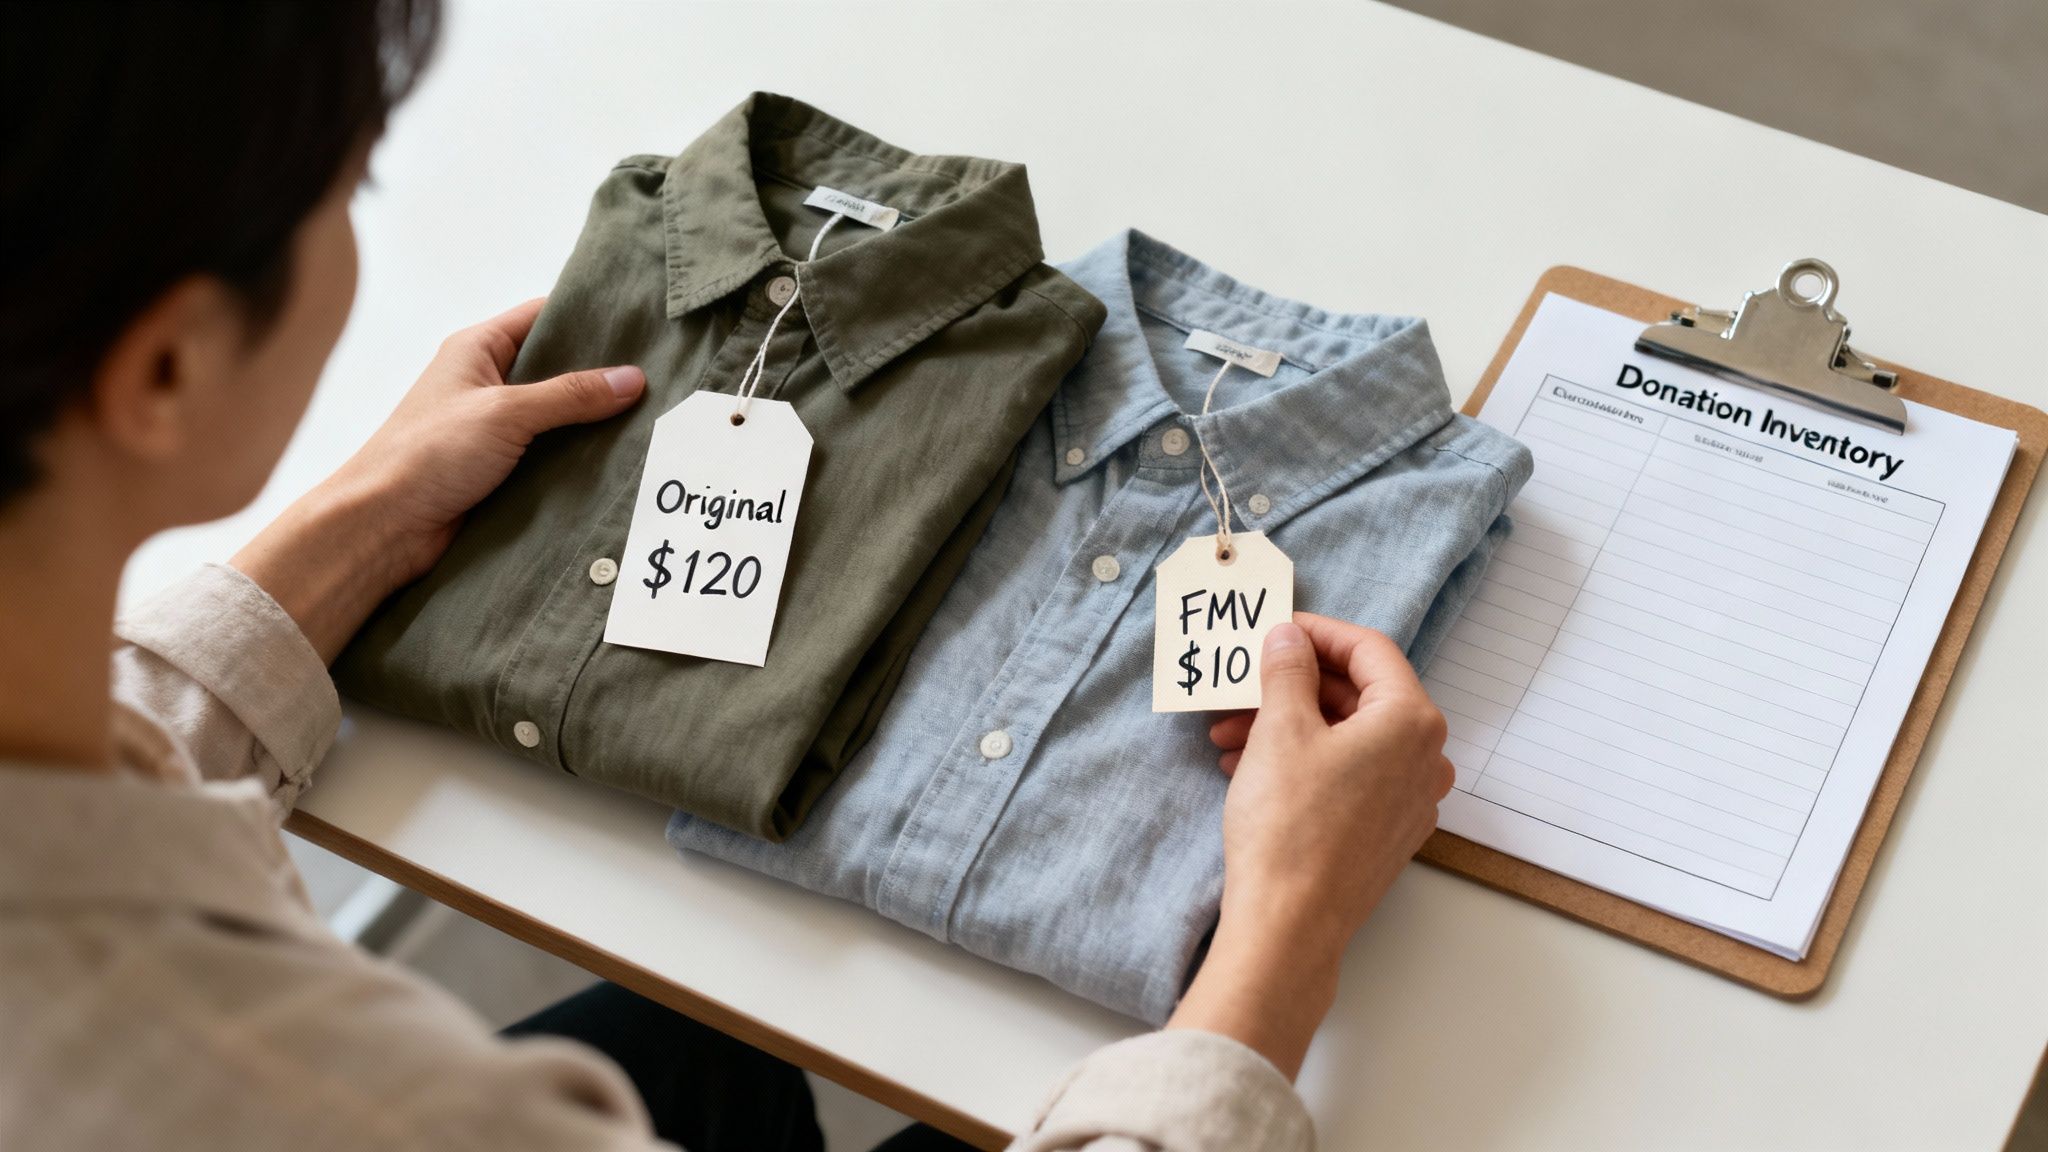
Your entire clothing donation deduction hinges on one key concept: Fair Market Value (FMV). In simple terms, this is the price a real person would actually pay for your item in its current state at a secondhand store. It’s a straightforward idea, but it’s exactly where so many donors get tripped up and make costly mistakes.
Think about it like selling an old bike online. You wouldn’t list it for the price you paid five years ago, right? Of course not. You’d factor in the brand, its mileage, a few scratches here and there, and what similar bikes are going for today. Valuing your donated clothes works the exact same way.
The IRS is crystal clear on this: you can’t deduct the original retail price or a value based on how much you loved it. That favorite concert t-shirt might feel priceless to you, but its FMV is what a shopper would realistically hand over for it at a thrift store.
The “Good Condition or Better” Rule
Before you even start thinking about numbers, the IRS has a hard-and-fast rule for donated clothing: it must be in “good used condition or better” to be deductible at all. This isn’t just bureaucratic red tape; it’s a practical measure to stop people from claiming deductions for items that have no real value to the charity.
If a charity can’t sell a shirt with a giant stain or jeans with a busted zipper, the IRS isn’t going to let you deduct it. This rule is your first and most important filter.
- What makes the cut? Items that are clean, wearable, and don’t have any major damage. A little fading or gentle wear is totally fine.
- What gets tossed? Anything with rips, permanent stains, missing buttons, broken zippers, or excessive pilling. These items belong in the recycling bin, not on your donation list.
Being honest with yourself here is your best defense. Trying to sneak in poor-condition items is a huge red flag that could put your entire donation claim at risk if you’re ever audited.
The Factors That Shape Fair Market Value
So, what actually determines an item’s FMV? It’s a mix of a few key ingredients. Just like pricing that used bike, you have to look at the whole picture to get it right.
Your goal is to land on a price that’s fair, realistic, and reflects what your items are actually worth in the secondhand market. That’s the only number the IRS cares about.
And remember, donating clothes is a powerful way to live more sustainably. The global secondhand apparel market is on track to hit an incredible $218 billion by 2026, more than double what it was in 2021. When you donate, you extend a garment’s life by an average of 2.2 years, slashing its carbon, water, and waste footprints by about 82%. You can discover more about the impact of clothing donation statistics and see how your contributions really do make a difference.
Putting It All Together for an Accurate Value
To land on a defensible clothing donation value, you have to see how brand, age, and condition all work together. A five-year-old designer dress that looks brand new could easily be worth more than a fast-fashion shirt from last year that’s already falling apart.
This is where getting organized is non-negotiable. Instead of just stuffing everything into a bag and guessing a total, you need to look at each item one by one. I know, it sounds a little tedious, but it’s the only way to create a credible, itemized list that will hold up under scrutiny.
DeductAble can be a lifesaver here. It helps you log each item, assign a condition, and find an appropriate value, making sure your records are complete and organized from the get-go. It turns a chore into a simple, manageable process.
How to Value Common Clothing Items You Donate
Moving from the abstract idea of “Fair Market Value” to putting a real number on that old pair of jeans can feel like a massive jump. How do you stop guessing and start using a consistent, defensible method?
It all comes down to creating clear condition categories and understanding the realistic value ranges for everyday clothing. This approach turns a confusing chore into a simple, repeatable process.
First, you need to become an objective inspector of your own clothes. Before you even think about the price, sort every single item into one of three buckets based on its condition. This framework is the foundation for every clothing donation value you’ll calculate.
- Good Condition: The item is gently used and definitely shows signs of wear. Think minor fading, a bit of pilling on a sweater, or a shirt that has softened up from many washes. It’s still completely wearable with life left in it, but it’s not fresh off the rack.
- Very Good Condition: This item has only been worn a handful of times and is in great shape. It has no visible flaws like stains, tears, or holes, and the fabric and color are still crisp. To a casual observer, it looks almost new.
- Excellent / Like New: An item in this category is pristine. It might have been worn just once or not at all, and it could still have the original tags attached (often abbreviated as NWT, or “New With Tags”). There are zero signs of wear.
This simple three-tiered system gives you a logical starting point. A basic t-shirt in “Good” condition will naturally have a different value than the exact same shirt in “Excellent” condition. Having this structure makes it easy to justify your reasoning later on.
Putting Numbers to Your Items
Once you’ve sorted everything by condition, you can start assigning dollar values. Remember, you’re not using the original retail price. You’re estimating what a shopper would realistically pay for that item in a secondhand store today.
Of course, the brand plays a huge role here. A well-known designer handbag will hold its value far better than a generic t-shirt, regardless of its condition.
This infographic breaks down the key factors that influence an item’s final Fair Market Value.
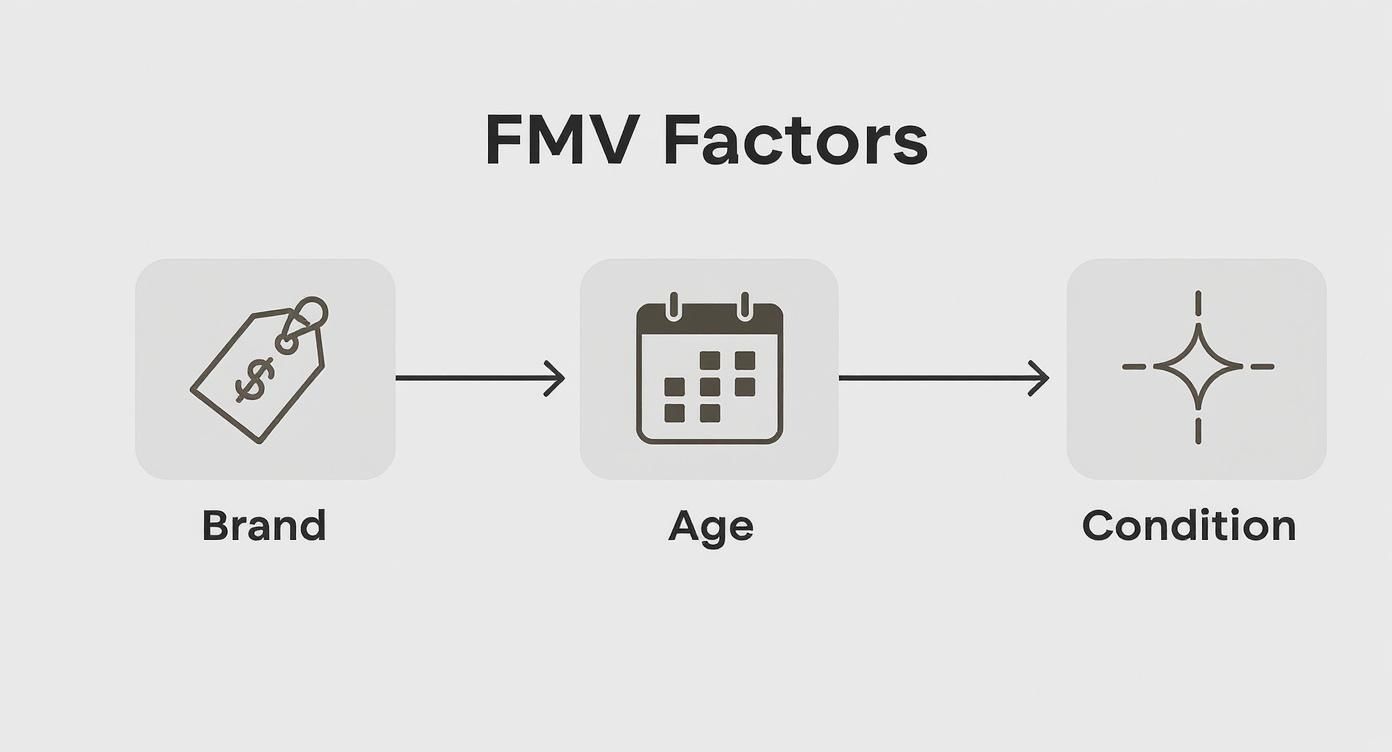
As you can see, an item’s brand, age, and condition all work together to determine its real-world worth in the secondhand market.
To give you a better feel for this, here are some common items and their typical Fair Market Value ranges. Think of this not as a rigid formula, but as a reliable guide to help you make consistent valuations. Many charities, like Goodwill, provide similar guides that are a fantastic resource. For a deeper dive, check out our Goodwill donation value guide, which offers even more detailed examples.
Sample Clothing Donation Value Ranges by Condition
This table gives you a solid idea of the estimated Fair Market Value for common clothing items, broken down by their condition.
| Item | Good Condition | Very Good Condition | Excellent / NWT |
|---|---|---|---|
| Men’s Jeans (Brand Name) | $7 – $15 | $16 – $25 | $26 – $40 |
| Women’s Blouse (Standard) | $3 – $6 | $7 – $12 | $13 – $20 |
| Winter Coat (Heavy) | $10 – $25 | $26 – $45 | $46 – $75+ |
| Children’s T-Shirt | $1 – $3 | $4 – $6 | $7 – $10 |
| Designer Handbag | $25 – $75 | $76 – $200 | $201 – $500+ |
As you can see, the value can swing dramatically. A standard winter coat in good, usable shape might be worth $15, but a like-new one from a premium brand could easily be valued at $75 or more. These ranges help anchor your estimates in reality.
A Practical and Defensible Approach
The whole point is to create a system that is both fair and easy to defend if the IRS ever asks. The classic way to do this is by creating a spreadsheet with columns for the item, brand, condition, and your final value. It works.
But let’s be honest—logging dozens or even hundreds of items one by one can become incredibly tedious.
This is exactly where modern tools come in. DeductAble lets you quickly log each item, select its condition, and find an appropriate value, all while building the itemized list the IRS requires. It completely removes the painful data entry and helps ensure your valuations are consistent and well-documented.
Ultimately, the best method for determining clothing donation value is one you can apply consistently to every single item. Whether it’s a pair of socks or a designer suit, a structured approach gives you the confidence that your final deduction is accurate and well-supported.
By taking a few extra minutes to inspect, categorize, and value each piece of clothing, you transform a pile of donations into a well-supported financial document. That diligence not only maximizes your tax benefit but also provides a clear, logical record of your charitable giving.
Creating Your Well-Supported Donation Records
A strong tax deduction for your donated clothing needs an even stronger paper trail. While figuring out the fair market value is a huge part of the puzzle, it’s the quality of your documentation that ultimately proves your claim to the IRS. Without the right records, even the most accurate valuations won’t hold up under scrutiny.
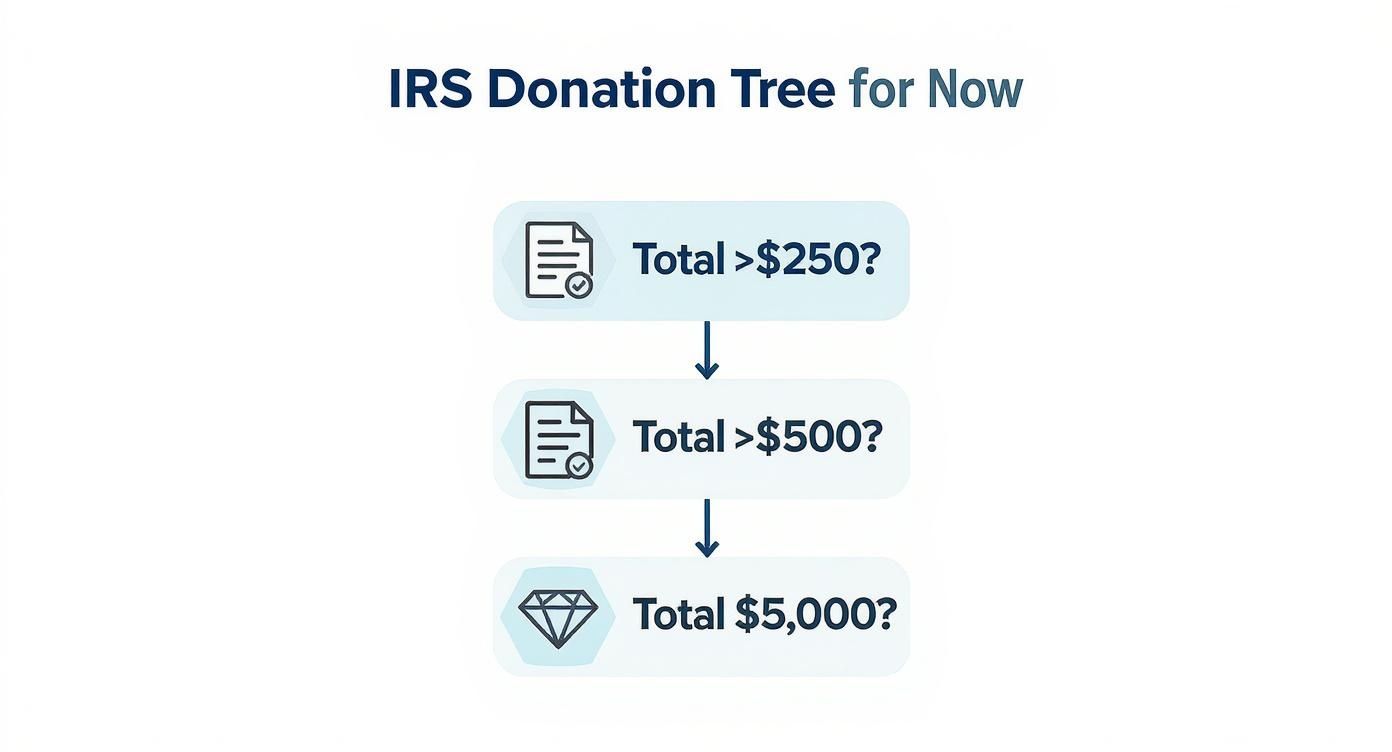
Think of it as building a case. Your valuation is the argument, but your records are the hard evidence. The IRS has specific rules that get stricter as the total value of your non-cash donations climbs throughout the year. Knowing these thresholds is the key to creating a file that’s ready for anything.
These aren’t just friendly suggestions—they’re firm requirements. If you miss a step, your entire deduction could be disallowed. That’s a frustrating and completely avoidable outcome.
Records for Donations Under $250
For any single donation trip where the total value is less than $250, the rules are pretty straightforward but non-negotiable. You must get a receipt from the charity for each and every drop-off. A bank statement or canceled check just doesn’t cut it for non-cash items like clothes.
Your receipt needs to have a few key details:
- The name of the charitable organization.
- The date and location where you made the donation.
- A decent description of what you gave (e.g., “one bag of men’s clothing,” “two boxes of children’s toys and clothes”).
The charity won’t put a value on the receipt—that part is up to you—but this document is your primary proof of the donation itself.
Documentation for Donations Between $250 and $500
Once the value of a single donation trip hits $250 (but stays under $500), the paperwork gets more serious. On top of the standard receipt, you now need a contemporaneous written acknowledgment from the charity.
This is a formal document that must state whether you received anything in return for your donation. If you got nothing, it needs to say that explicitly. This is a critical piece of evidence the IRS looks for.
This rule applies on a per-donation basis, not per year. So if you drop off two bags of clothes you’ve valued at $300, you need this specific acknowledgment for that one contribution.
Navigating Donations Valued Over $500
When your total non-cash donations for the year add up to more than $500, you’ve crossed a major IRS threshold. At this point, you’re required to file Form 8283, Noncash Charitable Contributions, with your tax return. This form isn’t just a summary; it demands a detailed, itemized list of what you donated, including each item’s condition and fair market value.
This is exactly where disorganized donors get into trouble. A vague receipt that just says “3 bags of clothing” won’t be enough to fill out Form 8283 correctly. You need to know what was in those bags—every shirt, pair of pants, and jacket.
Taking a quick photo of your items before you donate provides powerful visual proof of their existence and condition, which is a fantastic way to back up your itemized list. Keeping everything organized is absolutely essential here.
The impact of these donations goes far beyond your tax return, by the way. In the United States, clothing donation is a massive force for good, keeping millions of tons of textiles out of landfills. For instance, Goodwill alone handled around 107 million donations in 2021, which kept about 3.8 billion pounds of used goods from being trashed across North America.
Common Pitfalls That Can Cost You Your Deduction
Knowing the rules is half the battle. Knowing what not to do? That’s what keeps your hard-earned tax deduction safe.
Even with the best of intentions, a few simple mistakes can unravel all the work you’ve put into documenting your clothing donation value. Let’s walk through the most common blunders so you can sidestep them and build a well-supported record.
Mistake #1: Overvaluing Your Donations
This is, by far, the most frequent error. It’s so easy to remember the $125 you paid for those designer jeans, but that price tag is totally irrelevant to the IRS. Your deduction is based on Fair Market Value—what someone would pay for them today. Claiming the original retail price is a massive red flag.
Another trap is sentimental value. That jacket from a memorable trip might feel priceless to you, but its tax value is strictly about its condition and brand, not your memories. You have to stay objective to land on a number you can defend.
Mistake #2: Disorganized and Incomplete Records
A messy paper trail is perhaps the most damaging mistake of all. A vague, crumpled receipt with a single number like “$200” scribbled on it is practically an invitation for an audit. If you can’t produce a detailed list of what was actually in those bags, you have no real way to back up your claim.
Here’s where people usually drop the ball:
- Failing to Itemize: For donations over $500, an itemized list isn’t just a good idea—it’s a requirement for filing Form 8283. No list, no deduction.
- Forgetting Photos: A picture is worth a thousand words, especially to an auditor. Photos provide powerful, visual proof of your items’ existence and condition, reinforcing your valuation.
- Losing Receipts: You absolutely must have a dated receipt from the qualified charity for every single donation, no matter how small.
Think of it this way: your deduction is only as strong as the records that support it. In an audit, sloppy records are a losing argument.
Mistake #3: Technical and Procedural Gaffes
Beyond valuation and records, a few procedural slip-ups can also invalidate your deduction. These might seem like minor technicalities, but the IRS takes them seriously.
First, make sure you’re donating to a qualified 501(c)(3) organization. Your generous gift to a neighbor, a political campaign, or a for-profit thrift store won’t count for a tax deduction. If you’re ever unsure, just double-check the charity’s status using the IRS’s official Tax Exempt Organization Search tool.
Second, don’t forget to file the right paperwork. If your total non-cash donations for the year top $500, you must attach Form 8283 to your tax return. Forgetting this form is a surefire way to get your deduction disallowed.
By steering clear of these common errors, you protect your deduction and ensure your generosity is properly rewarded.
Your Step-by-Step Donation and Deduction Plan
Alright, let’s put all that theory into action. Following a clear game plan can turn the messy job of donating clothes into a smooth process that gets you the biggest possible deduction come tax season. This checklist breaks down the whole journey, from sorting your closet to filing your return.
Think of it as your donation workflow. Each step builds on the last, giving you a rock-solid foundation for a tax deduction that can stand up to scrutiny.
Step 1: Sort and Inspect Every Item
First things first: you need to play inspector. Go through your items one by one and be brutally honest about their condition. Pull out anything that doesn’t meet the IRS’s “good used condition or better” rule. That means anything with stubborn stains, rips, or broken zippers gets set aside for textile recycling, not the donation pile.
This initial sort is non-negotiable. It makes sure every single item you log for a deduction is legit. It’s also a great chance to group similar things together, which will make the next few steps a lot quicker.
Step 2: Create a Detailed Inventory
Once you have your stack of donation-worthy items, it’s time to make your master list. A simple spreadsheet can work, but DeductAble is built to make this part painless. For each piece of clothing, you’ll want to note:
- Item Type: (e.g., “Men’s Dress Shirt,” “Women’s Jeans”)
- Brand: (e.g., “Banana Republic,” “Levi’s”)
- Condition: (e.g., “Good,” “Very Good,” “Excellent/NWT”)
An itemized list is an absolute must if your total non-cash donations for the year top $500, since you’ll need it to fill out Form 8283. Honestly, getting into this habit now, no matter the value, is just a smart move.
Step 3: Assign a Fair Market Value
With your inventory ready, it’s time to assign a realistic Fair Market Value (FMV) to each item based on its brand and condition. Look back at the valuation guides and be consistent. Remember, the FMV isn’t what you paid for it—it’s what a shopper would realistically pay for it in a thrift store today.
This is where your careful record-keeping really pays off. A well-documented FMV for each individual item is way more credible than a single, guesstimated number for a whole bag of clothes.
Step 4: Photograph Your Items for Proof
Before you bag everything up, snap a few photos. You don’t need a professional photo shoot. Just get some clear pictures of your items to provide powerful visual proof of what you donated and what condition it was in. Group shots of similar items (like a pile of ten kids’ t-shirts) are totally fine and serve as excellent backup for your records.
Step 5: Donate and Get the Right Receipt
Now you’re ready to make the drop-off. Choose a qualified 501(c)(3) charity and—this is crucial—get a dated receipt right then and there. Make sure the charity’s name and address are on it. That simple piece of paper is your primary proof that the donation actually happened.
It’s pretty cool to see how even the collection process is getting smarter. Initiatives like Goodwill’s Clothing Collection Innovation Program are using smart bins with sensors to alert staff when they’re full. This has reportedly boosted collections by 30% and cut down on messy overflow, making sure more donations get where they need to go. You can read more about these global clothing donation trends to see how tech is changing the game.
Step 6: Compile and File Your Documentation
Last step: bring it all together. Scan your receipt or snap a photo of it, then store it digitally with your itemized list and pictures. When tax time rolls around, you’ll have a complete package to report your deduction accurately and fill out Form 8283 if you need to.
Your Top Questions About Donating Clothes, Answered
Even after you’ve sorted your piles and found a charity, a few tricky questions always seem to pop up. Let’s clear up some of the most common ones so you can donate with total confidence.
Can I Deduct Clothes That Are New With Tags?
You absolutely can, and they’ll almost always be worth more than similar used items. Just remember, you can’t claim the full price you paid at the store. The value is based on what someone would realistically pay for that brand-new item in a thrift or consignment shop—which is always a step down from the original retail price.
Make sure to note the “new with tags” (NWT) status in your records and snap a few photos. This gives you solid proof to justify a higher valuation within the secondhand market.
What Happens if My Non-Cash Donations Go Over $500?
This is a big one. Once the total value of all your non-cash donations (clothes, furniture, books—everything) crosses the $500 mark for the year, the IRS requires you to file an extra form with your taxes: Form 8283, Noncash Charitable Contributions.
Don’t skip this step. Forgetting to file Form 8283 when your non-cash donations top $500 is a surefire way to have your entire deduction for those items denied by the IRS.
DeductAble really shines here. It keeps all your itemized records neatly organized, so when it’s time to fill out that form, you’re not digging through a shoebox of receipts and trying to remember what you gave away back in March.
Do I Really Need a Receipt for Every Single Donation?
Yes, this is completely non-negotiable. The IRS wants to see a receipt from a qualified charity for every single time you donate, no matter how small the drop-off. If you visit Goodwill three times this year, you need three separate, dated receipts.
Think of these receipts as your primary evidence. They are the official proof that you actually made a donation on a specific date. Without them, you have nothing to back up your claim if the IRS ever asks.
Ready to stop guessing and start tracking your donations with confidence? DeductAble makes it easy to create itemized, well-supported records of your charitable giving, ensuring you get the maximum tax deduction you deserve. Get started today and see how simple it can be.