10 Common Tax Deductions Missed in 2025 That Cost You Money

Tax season often feels like a race against the clock, with many of us opting for the simplest path forward to meet the deadline. In that rush, it’s incredibly easy to overlook valuable write-offs that could significantly lower your tax bill. Every year, hardworking taxpayers overpay by hundreds, even thousands, of dollars simply because they aren’t aware of all the common tax deductions missed. These aren’t obscure loopholes for the ultra-wealthy; they are legitimate, accessible deductions for everyday expenses.

From the home office you now use daily to the vehicle mileage you accrue for business errands, these missed opportunities quickly add up. This guide is designed to shine a light on the 10 most frequently overlooked deductions, ensuring you claim every dollar you deserve. We’ll break down who qualifies for each, what documentation is required, and the common pitfalls to avoid.

1. Home Office Deduction

The explosion of remote work and self-employment has made the Home Office Deduction more relevant than ever, yet it remains one of the most common tax deductions missed by eligible taxpayers. This valuable deduction allows you to write off a portion of your home’s expenses if you use part of your home exclusively and regularly for your trade or business.

This deduction is primarily for self-employed individuals, freelancers, and independent contractors. Unfortunately, due to the Tax Cuts and Jobs Act of 2017, W-2 employees can no longer claim this deduction, even if their employer requires them to work from home.

How It Works: Two Methods

The IRS provides two ways to calculate this deduction, each with its own benefits.

  • The Simplified Method: This is the easiest approach. You can deduct $5 per square foot of your home office, up to a maximum of 300 square feet. This caps the deduction at $1,500 per year and requires minimal record-keeping.
  • The Regular Method: This method requires more detailed tracking but can yield a much larger deduction. You calculate the percentage of your home used for business (e.g., a 200-square-foot office in a 2,000-square-foot home is 10%). You can then deduct that percentage of your actual home expenses, including mortgage interest, property taxes, homeowners insurance, utilities, and repairs.

Key Insight: Choosing the right method is crucial. The simplified method is great for convenience, but if you have high housing costs and a larger dedicated workspace, the regular method will likely provide a significantly greater tax benefit.

Actionable Tips for Success

  1. Measure Accurately: Use a tape measure to determine the exact square footage of your office. Document this measurement and take photos to prove the space is used exclusively for business.
  2. Keep Meticulous Records: If using the regular method, keep every receipt and statement for home-related expenses. This includes utility bills, insurance premiums, and repair invoices.
  3. Understand “Exclusive Use”: Your home office must be a space used only for business. A desk in the corner of your family room generally doesn’t qualify. It should be a separate room or a distinctly partitioned area.

This is just one of many ways to lower your taxable income. For a broader look at tax-saving strategies, explore our guide on how to maximize your tax deductions.

2. Business Meals and Entertainment Deduction

The rules around deducting business meals and entertainment have changed significantly in recent years, causing confusion and leading many business owners to miss out on legitimate write-offs. This deduction allows you to subtract the cost of ordinary and necessary food and beverage expenses incurred while conducting business, making it a crucial one for entrepreneurs, freelancers, and sales professionals.

While the extravagant “three-martini lunch” era is long gone, the IRS still permits valuable deductions. Generally, business meals with clients, partners, or employees are 50% deductible if they are not lavish and you (or an employee) are present. Entertainment expenses, like tickets to a sporting event, are no longer deductible.

How It Works: The 50% Rule

The core of this deduction is straightforward, but documentation is everything.

  • Standard 50% Deduction: For most business-related meals, you can deduct 50% of the total cost. This includes the food, beverages, taxes, and tips. For example, a $150 client dinner results in a $75 deduction. This applies to meals while traveling for business or taking a client out to discuss a project.
  • Temporary 100% Deduction: For 2021 and 2022, a special rule allowed for a 100% deduction for business meals purchased from a restaurant. This temporary provision has expired, so the 50% limit is back in effect for 2023 and beyond.

Key Insight: The distinction between meals and entertainment is critical. If you take a client to dinner and then a concert, only the cost of the dinner is potentially deductible. You must separate the expenses clearly in your records.

Actionable Tips for Success

  1. Document the Business Purpose: On every receipt, immediately write down who attended the meal and the specific business topic discussed. Simply writing “client lunch” is not enough for the IRS.
  2. Keep Itemized Receipts: Credit card statements are not sufficient proof. You must keep the itemized receipt showing what was purchased. This proves the expense was for food and beverages, not non-deductible entertainment.
  3. Separate Meal and Entertainment Costs: If an event includes both a meal and entertainment, ask for a separate bill for the food and drinks. If the costs are not stated separately on the invoice, none of it is deductible.

Properly tracking these expenses is vital for surviving an audit. To learn more about substantiating your business expenses, see our guide on how to maintain audit-proof records.

3. Professional Development and Education Expenses

Investing in your career is a smart move, but many people don’t realize they can get a tax break for it. The deduction for professional development and education expenses is one of the most frequently overlooked tax benefits, allowing you to write off costs incurred to maintain or improve the skills required in your current profession.

This deduction is available to self-employed individuals and, in some specific cases, W-2 employees. The key distinction is that the education must maintain or improve skills for your present job. Expenses for education that would qualify you for a new trade or business are generally not deductible.

What Qualifies as a Deductible Expense?

The IRS allows for a broad range of costs, as long as they directly relate to your existing work.

  • Tuition and Fees: This includes the cost of courses at a college, university, or vocational school.
  • Professional Development: Costs for seminars, webinars, and conferences that enhance your expertise. For example, a software developer attending a coding conference or an attorney taking continuing legal education (CLE) courses.
  • Certifications and Licenses: Fees for professional certifications, such as a CPA exam prep course for an accountant, or license renewal fees.
  • Related Costs: This can also include books, supplies, and even travel expenses if you must go away overnight for the training.

Key Insight: The primary test for this deduction is whether the expense helps you excel in your current role. Documenting this connection is essential, as education for a career change does not qualify.

Actionable Tips for Success

  1. Document the “Why”: Keep a note with your receipts explaining how each course or conference directly relates to improving skills for your current job. A syllabus or event agenda can serve as excellent proof.
  2. Separate Your Expenses: If you travel for a conference, keep meticulous records of your transportation, lodging, and meal costs. Only expenses directly related to the educational event are deductible.
  3. Keep All Proof of Payment: Retain every invoice, receipt, and bank statement related to your educational expenses. Certificates of completion are also valuable documentation to have on hand.

4. Vehicle Mileage Deduction

For freelancers, small business owners, and gig workers, vehicle expenses are often a significant cost of doing business. The Vehicle Mileage Deduction is a powerful tool to recoup these costs, yet many eligible taxpayers fail to claim its full value, making it one of the most common tax deductions missed. This deduction allows you to write off the costs of using your car for business purposes, such as driving to meet clients, traveling between job sites, or making deliveries.

Vehicle Mileage Deduction

It’s important to note that the drive from your home to your primary place of work (your regular commute) is not deductible. However, travel from your office to a client’s location, or between multiple business locations, absolutely qualifies.

How It Works: Two Methods

Just like the home office deduction, the IRS offers two methods for calculating your vehicle expenses.

  • The Standard Mileage Rate: This is the most straightforward option. You multiply your total business miles driven during the year by a standard rate set by the IRS. For 2024, this rate is 67 cents per mile. A real estate agent who drives 25,000 business miles could claim a deduction of $16,750 with this method.
  • The Actual Expense Method: This method involves tracking all the actual costs of operating your vehicle for the year. You then calculate the percentage of business use (business miles divided by total miles) and deduct that portion of your total expenses, which can include gas, oil changes, insurance, registration fees, repairs, and vehicle depreciation.

Key Insight: The standard mileage rate is simple and often yields a high deduction without intense record-keeping. The actual expense method may be more beneficial if you have a newer, more expensive vehicle with high depreciation or significant repair costs.

Actionable Tips for Success

  1. Keep a Contemporaneous Log: The IRS requires a detailed and timely mileage log. Record the date, starting and ending odometer readings, total mileage, and the business purpose for each trip.
  2. Leverage Technology: Manually logging every trip is tedious. Use a dedicated mileage-tracking app like MileIQ or Stride to automatically record your drives and easily classify them as business or personal.
  3. Don’t Forget Associated Costs: Even if you use the standard mileage rate, you can still deduct business-related parking fees and tolls separately. Keep receipts for these expenses.

Tracking business mileage is essential for maximizing your return. To learn more about other overlooked deductions, check out our guide on the ultimate list of tax write-offs for the self-employed.

5. Medical and Dental Expenses (Self-Employed Health Insurance)

For the growing ranks of freelancers and small business owners, managing healthcare costs is a major concern. The Self-Employed Health Insurance Deduction is a powerful, yet often overlooked, tax benefit that directly addresses this challenge. This valuable deduction allows you to subtract the cost of medical, dental, and qualified long-term care insurance premiums for yourself, your spouse, and your dependents.

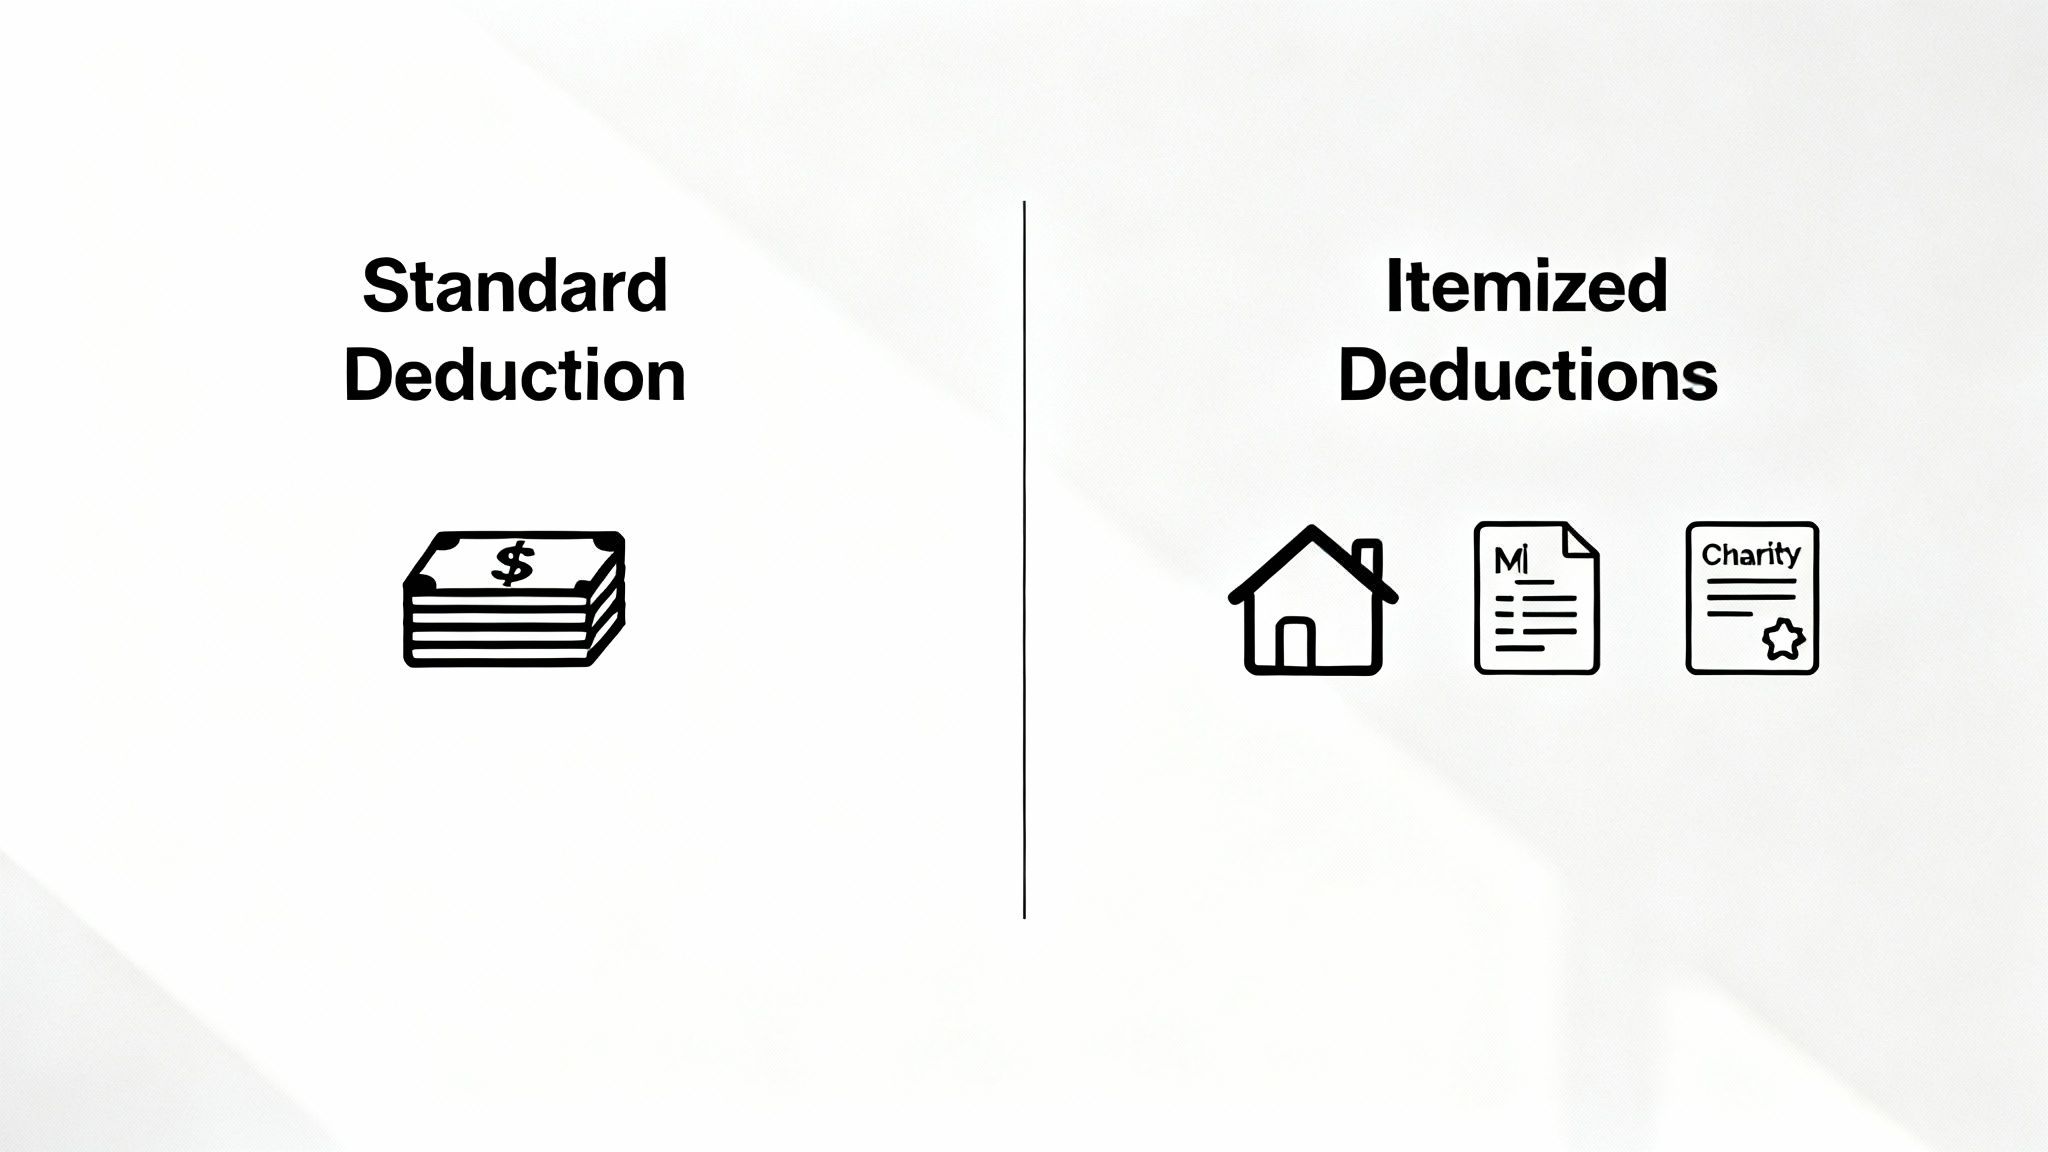
This is an “above-the-line” deduction, meaning you can claim it even if you take the standard deduction. It directly reduces your adjusted gross income (AGI), which can help you qualify for other tax credits and deductions. To be eligible, you must have a net profit from your business, and the policy can be established either under your business or your own name.

How It Works

The deduction is straightforward but has important limitations. You can deduct 100% of the health and dental insurance premiums you paid, but the total deduction cannot exceed the net profit from your self-employment business. For instance, if your business earned a net profit of $50,000 and you paid $15,000 in health insurance premiums, you can deduct the full $15,000. However, if your premiums were $15,000 and your net profit was only $12,000, your deduction would be capped at $12,000.

This deduction is claimed on Schedule 1 of your Form 1040. It’s crucial to note that you generally cannot claim this deduction if you or your spouse were eligible to participate in an employer-subsidized health plan, even if you chose not to enroll.

Key Insight: This is not an itemized deduction for medical expenses on Schedule A. It is a separate, more advantageous deduction for self-employed individuals that directly lowers your AGI, making it one of the most impactful common tax deductions missed.

Actionable Tips for Success

  1. Confirm Your Eligibility: Before tax time, verify that you were not eligible for an employer-sponsored plan through your own job (if you have one) or your spouse’s. This is a common point of confusion that can lead to an incorrect claim.
  2. Keep Meticulous Records: Retain all documents proving you paid the premiums, such as bank statements, canceled checks, and policy statements (Form 1095-A, B, or C). These records are essential in case of an IRS inquiry.
  3. Track Your Business Profit: Your deduction is limited by your net business income. Maintain accurate bookkeeping throughout the year to ensure you know your profit and can correctly calculate the maximum allowable deduction.

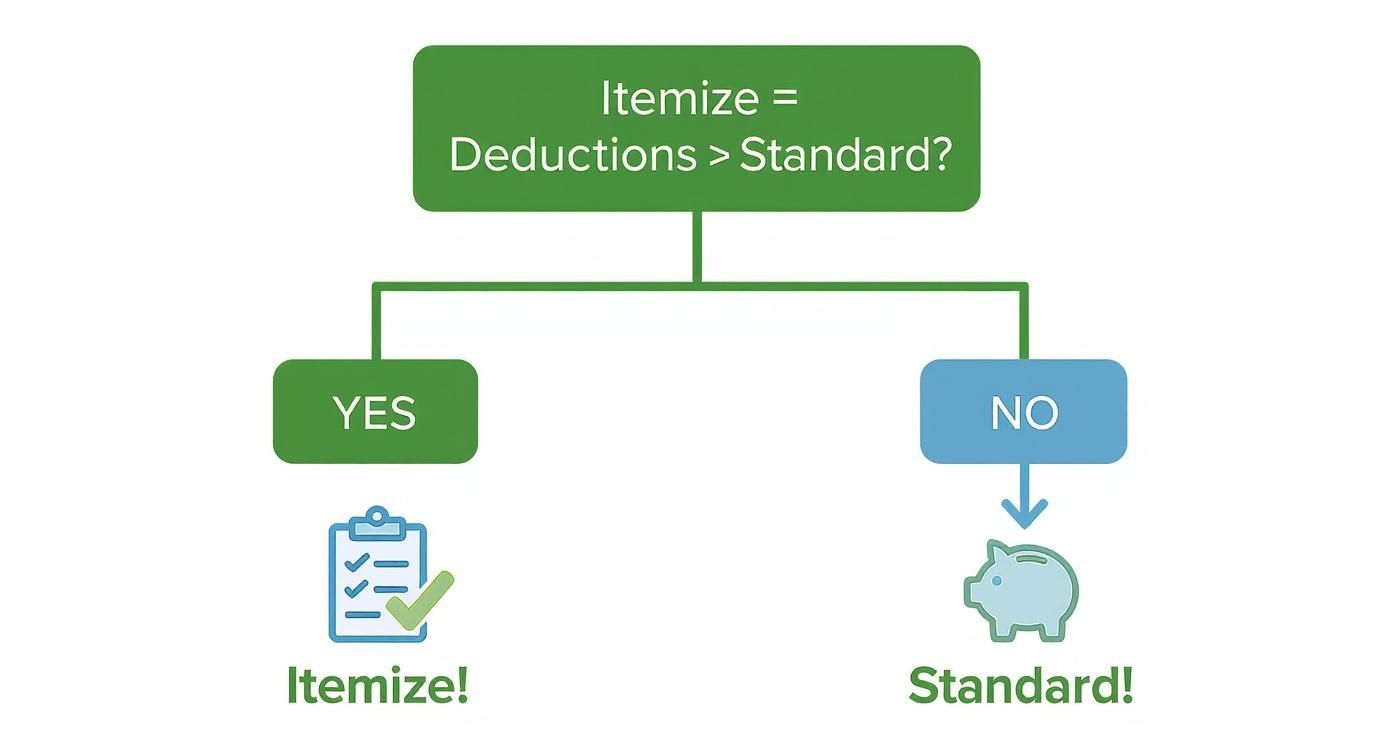
Understanding how different deductions interact is key to a solid tax strategy. For a deeper dive into your options, check out our guide on the itemized deduction vs. standard deduction.

6. Charitable Contributions and Donations

Giving back is rewarding, but it can also provide a significant tax benefit. Yet, many taxpayers fail to deduct the full value of their generosity, making the deduction for charitable contributions one of the most common tax deductions missed. This is often due to poor record-keeping or uncertainty about what qualifies. This deduction allows taxpayers who itemize to reduce their taxable income by the value of what they give to qualified charitable organizations.

It covers cash donations, payroll deductions, and non-cash items like clothing, household goods, vehicles, and appreciated stocks. Proper documentation and accurate valuation are the keys to unlocking this powerful write-off and maximizing your itemized deductions.

Charitable Contributions and Donations

How It Works: Cash vs. Non-Cash Donations

The IRS has specific rules for valuing and documenting different types of donations.

  • Cash Contributions: The most straightforward donation type, including contributions by cash, check, or credit card. You can generally deduct the full amount given to a qualified organization.
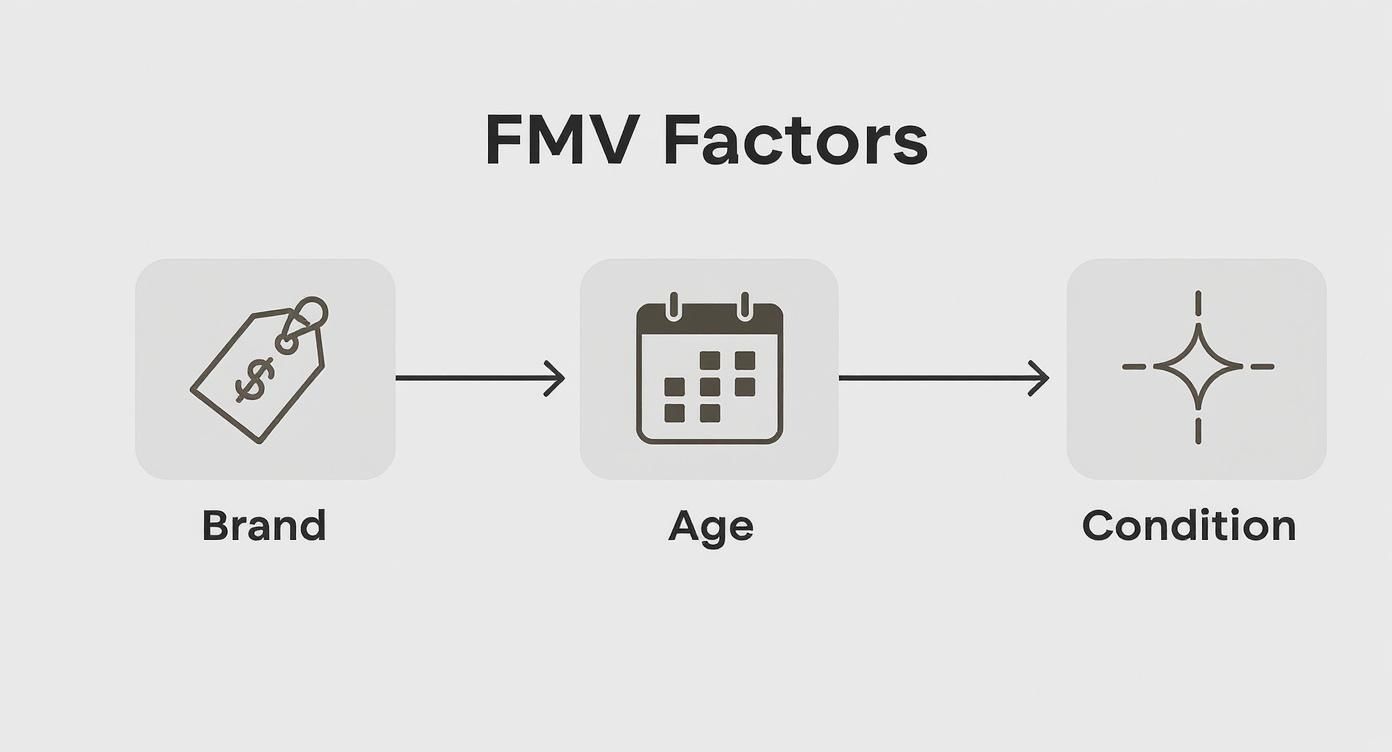
  • Non-Cash Contributions: This includes donating goods like clothing, furniture, or electronics. For these items, you deduct their fair market value (FMV)—what they would sell for in their current condition—at the time of donation. For high-value items, special rules may apply.

Key Insight: Donating appreciated stocks held for more than a year is a powerful tax-saving strategy. You can typically deduct the full fair market value of the stock and avoid paying capital gains tax on the appreciation—a double tax benefit.

Actionable Tips for Success

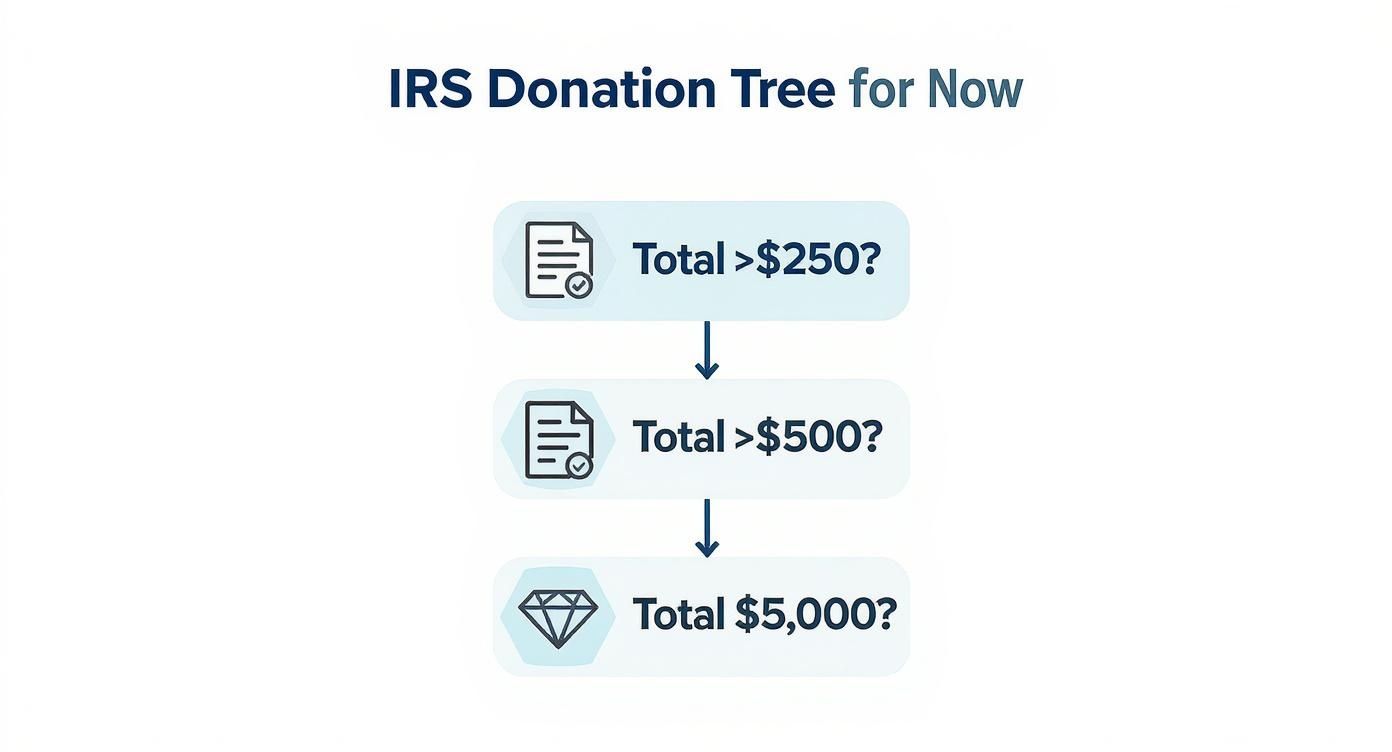
  1. Keep Meticulous Records: The IRS requires proof. For any single contribution of $250 or more (cash or non-cash), you must have a written acknowledgment from the charity. For smaller donations, a bank record or receipt is sufficient.
  2. Value Items Correctly: For non-cash items, determining the fair market value is critical. This is where many taxpayers who previously used Intuit’s ItsDeductible now need an effective replacement. Tools that assist in calculating FMV are invaluable for maximizing this deduction.
  3. Track Related Expenses: Don’t forget to deduct out-of-pocket expenses incurred while volunteering. This includes the cost of supplies and mileage driven for the charity, which can be deducted at a rate of 14 cents per mile.

Properly documenting non-cash donations is a hassle without the right system. As the best replacement for the now-deprecated ItsDeductible, DeductAble helps you accurately value and track your donated goods, ensuring you get the maximum deduction you deserve. For more details, review our guide on charitable donation receipt requirements.

7. Home Office Utilities and Services Deduction

While many who qualify for the home office deduction remember to claim rent or mortgage interest, a significant number overlook the powerful, related deductions for utilities and services. This is one of the most common tax deductions missed within the home office category, leaving substantial savings on the table. If you operate a business from home, you can deduct the business portion of costs like electricity, internet, and even software subscriptions.

This deduction is a component of the “regular method” for the home office deduction, available exclusively to self-employed individuals, freelancers, and independent contractors. It allows you to write off the portion of your household utility and service bills that are directly attributable to running your business.

How It Works: Proportional vs. Direct Expenses

Calculating this deduction involves separating your expenses into two categories.

  • Indirect Expenses: These are costs that benefit your entire home, such as electricity, water, and internet service. You must determine the business-use percentage of your home (e.g., a 200-square-foot office in a 2,000-square-foot home is 10%). You can then deduct that percentage of each utility bill. A $200 monthly internet bill would yield a $20 monthly deduction ($200 x 10%).
  • Direct Expenses: These are costs that are 100% for your business. A common example is a dedicated business phone line installed in your home office. Since this service is used exclusively for your business, you can deduct the entire cost without proration.

Key Insight: Don’t just stop at the big utilities like power and internet. The business portion of services like home security, trash removal, and general home maintenance can also be included in your calculation, often adding hundreds of dollars to your total deduction.

Actionable Tips for Success

  1. Allocate Your Bills: At the end of each month, review your utility bills (electricity, gas, water, internet) and apply your home office percentage to calculate the deductible portion. Keep a running log in a spreadsheet.
  2. Separate When Possible: Consider getting a dedicated business phone line or internet service if your work demands it. This makes the expense a direct, 100% deductible cost and simplifies record-keeping.
  3. Track All Service Subscriptions: Keep meticulous records of all software subscriptions (e.g., Adobe Creative Cloud, Microsoft 365) and online services used exclusively for your business within your home office. These are often fully deductible.

By carefully tracking these often-forgotten expenses, you can significantly increase the value of your home office deduction. For more on maximizing your business-related write-offs, see our guide on essential tax deductions for the self-employed.

8. Office Supplies and Equipment Deduction

Every self-employed individual, from freelancers to small business owners, incurs costs for the tools of their trade. The Office Supplies and Equipment Deduction allows you to write off the costs of tangible items necessary to run your business, yet many fail to capture the full value of these everyday purchases.

This deduction covers everything from pens and paper to computers, software, and office furniture. For items that have a useful life of one year or less, you can generally deduct the full cost in the year you buy them. For more expensive, long-lasting items like machinery or a high-end computer, special rules apply that can provide significant tax savings.

Office Supplies and Equipment Deduction

How It Works: Expensing vs. Depreciating

Understanding the difference between supplies and equipment is key to maximizing this common tax deduction. The IRS provides specific rules for how to deduct these business assets.

  • Supplies (Expensing): Items that are used up within one year, such as printer ink, paper, and postage, are considered supplies. You can deduct 100% of their cost in the year of purchase as a current business expense.
  • Equipment (Depreciation or Section 179): More substantial items like computers, desks, and machinery are considered assets. You can either depreciate them, spreading the deduction over several years, or use a special rule called the Section 179 deduction to potentially expense the entire cost in the purchase year, up to certain limits.

Key Insight: The de minimis safe harbor election allows businesses to immediately expense items costing up to $2,500 per item. This simplifies bookkeeping and accelerates your tax savings, making it a powerful tool for small business owners.

Actionable Tips for Success

  1. Categorize Purchases Correctly: When you buy something, immediately decide if it’s a “supply” (used within a year) or “equipment” (a long-term asset). This will dictate how you record and deduct it.
  2. Keep Every Receipt: Meticulous record-keeping is non-negotiable. Save all digital and physical receipts for office-related purchases, no matter how small. A shoebox of receipts is better than nothing, but a digital system is best.
  3. Leverage Section 179: For significant equipment purchases, such as a new computer system or specialized machinery, talk to your tax professional about using the Section 179 deduction. This can dramatically reduce your taxable income for the year.

This is just one of many ways to lower your taxable income. For a broader look at tax-saving strategies, explore our guide on how to maximize your tax deductions.

9. Insurance Premiums Deduction (Business Liability and Property)

Protecting your business from risk is a fundamental cost of operating, and the IRS recognizes this by allowing you to deduct the premiums you pay for various business insurance policies. These deductions for ordinary and necessary insurance expenses are frequently underclaimed, yet they represent a significant opportunity for self-employed individuals and business owners to reduce their taxable income.

This deduction is available to anyone running a business, whether you’re a freelancer, independent contractor, or small business owner. The premiums paid for policies that cover fire, theft, flood, general liability, professional malpractice, and similar risks are all generally deductible. This also includes workers’ compensation and commercial vehicle insurance.

How It Works: Key Categories of Deductible Premiums

Deductible business insurance premiums cover a wide range of potential liabilities and losses, directly lowering your business’s net profit.

  • Liability Insurance: This covers policies like general liability (for accidents or injuries) and professional liability (malpractice or “errors and omissions” insurance), which protect you from claims related to your business activities.
  • Property & Asset Insurance: Premiums for policies covering your business property, such as commercial property insurance for an office or retail space, and insurance on business vehicles are deductible.
  • Personnel-Related Insurance: This includes state-mandated workers’ compensation insurance, which covers employee job-related injuries or illnesses. Health insurance premiums paid for your employees are also a deductible business expense.

Key Insight: Don’t overlook this category of expenses. Insurance is not just a protective measure; it is a direct business cost that reduces your tax liability. Meticulously tracking these payments throughout the year can lead to substantial savings.

Actionable Tips for Success

  1. Separate Business from Personal: Ensure your business policies are distinct from your personal ones. For example, if you use your personal car for business, you can only deduct the business-use portion of your auto insurance premium.
  2. Keep Detailed Records: Maintain a file with all your insurance policies, declarations pages, and proof of premium payments (bank statements or canceled checks). This documentation is essential in case of an audit.
  3. Review Coverage Annually: Schedule an annual review of your business insurance needs. As your business grows or changes, your coverage requirements may shift, impacting your deductible premiums. This ensures you are both adequately protected and maximizing your deduction.

This is just one of many ways to lower your taxable income. For a broader look at tax-saving strategies, explore our guide on how to maximize your tax deductions.

10. Research and Development Tax Credit

While many entrepreneurs associate tax breaks with deductions, the Research and Development (R&D) Tax Credit is a powerful, yet frequently missed, opportunity to reduce your tax bill directly. Unlike a deduction that lowers taxable income, a credit reduces your tax liability dollar-for-dollar. It’s designed to reward businesses for investing in innovation to develop new or improved products, processes, or software.

This credit is not just for major corporations in lab coats; many small businesses and startups qualify without realizing it. The key is engaging in “qualified research activities,” which can include everything from developing a new manufacturing process to creating a proprietary software algorithm. Even activities that ultimately fail can qualify.

How It Works: A Direct Tax Reduction

The R&D tax credit calculation can be complex, but it generally rewards businesses for increasing their research spending. It’s calculated based on qualified research expenses (QREs), which typically include:

  • Wages: Salaries paid to employees who are directly performing, supervising, or supporting R&D activities.
  • Supplies: Costs of tangible supplies used and consumed during the research process.
  • Contract Research: 65% of the amount paid to third-party contractors for conducting qualified research on your behalf.

For example, a tech startup that spends $200,000 on developer salaries and supplies for a new AI project could potentially generate a federal credit of $10,000 or more, plus potential state credits.

Key Insight: The R&D credit is retroactive. Businesses can often amend tax returns for the previous three years to claim credits they missed, potentially resulting in a significant cash refund from the IRS.

Actionable Tips for Success

  1. Document Contemporaneously: Don’t wait until tax time to build your case. Keep detailed project notes, test results, and meeting minutes that demonstrate your research process and technical uncertainties.
  2. Track Employee Time: Maintain records or time-tracking reports that show how much time each employee spends on qualified R&D activities versus routine tasks. This is crucial for accurately calculating wage expenses.
  3. Record Failures and Iterations: The R&D process is one of experimentation. Documenting failed attempts and design changes provides strong evidence that you were engaged in a process of discovery to eliminate technical uncertainty, which is a core requirement for the credit.

This powerful credit is one of many specialized tax strategies available. For a broader look at tax-saving opportunities, explore our guide on how to maximize your tax deductions.

Top 10 Missed Tax Deductions Comparison

Deduction/Credit 🔄 Implementation Complexity ⚡ Resource Requirements 📊 Expected Impact 💡 Ideal Use Cases ⭐ Key Advantages
Home Office Deduction Medium 🔄 (simplified or regular methods) Moderate ⚡: square footage, receipts, photos, Form 8829 High 📊: substantial income reduction for qualifying space Self-employed or remote workers with exclusive office space Significant deduction; simplified option available
Business Meals & Entertainment Deduction Low–Medium 🔄 (50% rule, documentation needed) Low ⚡: itemized receipts, business purpose, attendee list Medium 📊: partial deduction (generally 50%) Client meetings, business travel, team meals Common expense; often overlooked opportunity
Professional Development & Education Expenses Low–Medium 🔄 (must relate to current job) Moderate ⚡: invoices, certificates, syllabi, travel records Low–Medium 📊: modest savings; preserves professional standing Maintaining licenses, certifications, job-related courses Encourages skill upkeep; broad eligible expenses
Vehicle Mileage Deduction Low–Medium 🔄 (standard vs actual methods) High ⚡: detailed contemporaneous mileage log or receipts Medium–High 📊: significant for high-mileage users Sales agents, delivery drivers, traveling consultants Simple standard-rate option; can yield large deductions
Medical & Dental Expenses (Self‑Employed Health Insurance) Low 🔄 (above‑the‑line claim) Moderate ⚡: policy statements, premium receipts High 📊: reduces AGI directly Self-employed individuals paying family premiums Above‑the‑line deduction; covers family members
Charitable Contributions & Donations Medium 🔄 (itemizing, appraisal rules) Moderate ⚡: receipts, acknowledgment letters, appraisals Medium‑High 📊: meaningful if itemized and sizable Donors giving cash, securities, or high‑value items Tax‑efficient giving (esp. appreciated securities)
Home Office Utilities & Services Deduction Low–Medium 🔄 (allocation by percentage) Moderate ⚡: utility bills, allocation method, subscription records Low–Medium 📊: recurring small savings add up Home-based workers with proportional internet/phone use Often overlooked; easy proportional calculation
Office Supplies & Equipment Deduction Low–Medium 🔄 (Section 179/depreciation rules) Moderate ⚡: receipts, asset inventory, Form 4562 Medium–High 📊: immediate expensing possible under Section 179 Startups and businesses purchasing computers/equipment Immediate write‑offs; boosts cash flow for purchases
Insurance Premiums Deduction (Business Liability & Property) Low 🔄 (ordinary business expense) Low ⚡: policy documents and premium records Low–Medium 📊: offsets insurance costs Businesses needing liability, property, or workers’ comp Essential protection with clear deductibility
Research & Development Tax Credit High 🔄 (complex eligibility & documentation) High ⚡: contemporaneous project records, payroll tracking, Form 6765 High 📊: dollar‑for‑dollar tax reduction; sometimes refundable Tech, biotech, manufacturing, software development Direct credit vs. deduction; large savings for R&D spendments

Turn Missed Deductions into Maximum Savings

Navigating the landscape of tax deductions can often feel like searching for hidden treasure without a map. As we’ve explored, from the intricacies of the home office deduction to the often-overlooked medical expense write-offs, numerous opportunities exist to significantly lower your taxable income. The primary reason these valuable deductions are missed isn’t a lack of eligibility, but rather a combination of unawareness and the perceived burden of meticulous record-keeping. The difference between a good tax return and a great one often lies in the details you capture throughout the year, not just in the frantic days leading up to the filing deadline.

This exploration of common tax deductions missed reveals a powerful theme: proactive tracking is the cornerstone of a successful tax strategy. Whether it’s logging every business mile, saving receipts for professional development courses, or documenting the fair market value of donated goods, consistent documentation transforms potential deductions from abstract concepts into concrete, defensible savings. The key is to build simple, repeatable habits and leverage modern tools to do the heavy lifting for you.

From Overlooked to Optimized: Key Takeaways

The journey to tax optimization is paved with small, consistent actions. Here are the most critical takeaways to implement immediately:

  • Systemize Your Record-Keeping: Don’t rely on memory or a shoebox full of crumpled receipts. Designate a digital or physical system for every category of potential deduction, whether it’s for business expenses, medical bills, or charitable giving. Consistency is your greatest ally against leaving money on the table.
  • Understand the “Why” Behind the Deduction: Knowing that a home office deduction exists is one thing; understanding the exclusive and regular use test is another. By grasping the specific qualification criteria for each deduction, you can confidently determine your eligibility and gather the correct supporting documentation from the start.
  • Embrace Specialization for Charitable Giving: For many, charitable non-cash donations represent one of the most significant and frequently missed opportunities. With the deprecation of ItsDeductible, many taxpayers were left searching for a reliable ItsDeductible replacement. This is precisely where a specialized tool becomes indispensable.

Actionable Next Steps to Secure Your Savings

Knowledge without action is just trivia. To turn these insights into tangible financial benefits, focus on these immediate steps:

  1. Conduct a Self-Audit: Review the list of deductions covered in this article. Which ones might apply to your situation from the previous year or the current one? Make a personalized checklist and identify where you need to improve your tracking methods.
  2. Choose Your Tools Wisely: Select apps and software that simplify your life. A dedicated mileage tracker for your vehicle, accounting software for your small business, and a specialized tool for charitable donations can automate much of the process. For those non-cash contributions, as well as cash and mileage donations, DeductAble offers a modern, intuitive solution designed to fill the void left by ItsDeductible, ensuring you get full credit for your generosity.
  3. Schedule Regular Check-ins: Set a recurring calendar appointment, perhaps monthly or quarterly, to review and organize your receipts and records. This small habit prevents the overwhelming year-end scramble and ensures no common tax deductions are missed.

Ultimately, mastering your tax deductions is an act of financial empowerment. It’s about ensuring the money you’ve earned works for you in the most efficient way possible. By shifting your mindset from reactive tax preparation to proactive financial management, you transform tax season from a period of stress into a moment of strategic advantage. You are not just a taxpayer; you are the CFO of your own life. Start today, and make this the year you claim every single dollar you deserve.


Ready to stop guessing the value of your donated goods and start maximizing your charitable deductions with confidence? We developed DeductAble as the modern, user-friendly replacement for ItsDeductible, helping you meticulously track and value your non-cash contributions. Visit DeductAble.ai to see how you can turn your generosity into significant tax savings.

Unlocking Your Clothing Donation Value

Donating clothes does more than just clear out closet space—it can actually lower your tax bill in a meaningful way. But here’s the secret most people miss: the clothing donation value isn’t what you paid for the items. It’s their Fair Market Value (FMV) at the time of donation, and getting that right is the key to maximizing your deduction legally and with total confidence.

The Real Value Hiding in Your Donated Clothes

A person holding a box of clothes ready for donation, with a neat closet in thebackground.

We’ve all been there. You clean out your closet, fill a few bags, and drop them off at a local charity. They hand you a blank receipt, you scribble a rough guess—maybe $100 or $200—and hope for the best when tax season rolls around. It’s a common routine, but it’s one that leaves a ton of money on the table and opens you up to unnecessary risk if the IRS ever comes knocking.

The true value of your donation is a real financial calculation, not just a feel-good gesture. Every single shirt, pair of jeans, and winter coat has a specific worth that can translate into a real tax benefit. The IRS has very clear rules about how this value is determined and, just as importantly, how it’s documented. Trust me, guessing a round number for a trash bag full of clothes just won’t cut it.

Shifting Your Mindset to Maximize Your Giving

To turn your charitable giving into a smart financial move, you have to start thinking differently. It’s not about just getting rid of old stuff; it’s about building a solid case for a legitimate tax deduction. That means you need to get organized, pay attention to the details, and understand what actually gives your used items value.

Unlocking the full potential of your deduction involves more than a quick drop-off. You need a game plan.

  • Valuing Items Accurately: This means learning how to assign a realistic Fair Market Value to each individual item based on its condition, brand, and what someone would actually pay for it today.
  • Creating Detailed Records: The IRS requires an itemized list for any non-cash donation over $500. This is non-negotiable.
  • Gathering Solid Proof: You need the right paperwork, like a dated receipt from the charity. Taking photos of your items before you donate is an even better way to back up your claims.

Think of your donations with the same seriousness you’d apply to any other financial transaction. When you do, you ensure you get every penny of the tax credit you deserve while supporting the causes you believe in. This organized approach is the bedrock of a well-supported deduction.

The Path to a Confident Deduction

This guide is going to walk you through everything you need to know about clothing donation value, step by step. We’ll break down the confusing IRS rules into simple, actionable advice. You’ll learn how to assess your items like a pro, create a perfect paper trail, and sidestep the common mistakes that trip up so many taxpayers.

DeductAble makes this whole process incredibly simple, letting you create detailed, itemized lists right from your phone. But whether you use a dedicated app or a simple spreadsheet, the core principles are the same.

A great first step is understanding the bigger picture of charitable giving. You can learn more about what donations are tax deductible to see how your clothing fits into the overall strategy. By the time you’re done with this guide, you’ll be ready to turn that pile of clutter into a well-documented, valuable tax deduction.

Decoding Fair Market Value for Your Donations

Your entire clothing donation deduction hinges on one key concept: Fair Market Value (FMV). In simple terms, this is the price a real person would actually pay for your item in its current state at a secondhand store. It’s a straightforward idea, but it’s exactly where so many donors get tripped up and make costly mistakes.

Think about it like selling an old bike online. You wouldn’t list it for the price you paid five years ago, right? Of course not. You’d factor in the brand, its mileage, a few scratches here and there, and what similar bikes are going for today. Valuing your donated clothes works the exact same way.

The IRS is crystal clear on this: you can’t deduct the original retail price or a value based on how much you loved it. That favorite concert t-shirt might feel priceless to you, but its FMV is what a shopper would realistically hand over for it at a thrift store.

The “Good Condition or Better” Rule

Before you even start thinking about numbers, the IRS has a hard-and-fast rule for donated clothing: it must be in “good used condition or better” to be deductible at all. This isn’t just bureaucratic red tape; it’s a practical measure to stop people from claiming deductions for items that have no real value to the charity.

If a charity can’t sell a shirt with a giant stain or jeans with a busted zipper, the IRS isn’t going to let you deduct it. This rule is your first and most important filter.

  • What makes the cut? Items that are clean, wearable, and don’t have any major damage. A little fading or gentle wear is totally fine.
  • What gets tossed? Anything with rips, permanent stains, missing buttons, broken zippers, or excessive pilling. These items belong in the recycling bin, not on your donation list.

Being honest with yourself here is your best defense. Trying to sneak in poor-condition items is a huge red flag that could put your entire donation claim at risk if you’re ever audited.

The Factors That Shape Fair Market Value

So, what actually determines an item’s FMV? It’s a mix of a few key ingredients. Just like pricing that used bike, you have to look at the whole picture to get it right.

Your goal is to land on a price that’s fair, realistic, and reflects what your items are actually worth in the secondhand market. That’s the only number the IRS cares about.

And remember, donating clothes is a powerful way to live more sustainably. The global secondhand apparel market is on track to hit an incredible $218 billion by 2026, more than double what it was in 2021. When you donate, you extend a garment’s life by an average of 2.2 years, slashing its carbon, water, and waste footprints by about 82%. You can discover more about the impact of clothing donation statistics and see how your contributions really do make a difference.

Putting It All Together for an Accurate Value

To land on a defensible clothing donation value, you have to see how brand, age, and condition all work together. A five-year-old designer dress that looks brand new could easily be worth more than a fast-fashion shirt from last year that’s already falling apart.

This is where getting organized is non-negotiable. Instead of just stuffing everything into a bag and guessing a total, you need to look at each item one by one. I know, it sounds a little tedious, but it’s the only way to create a credible, itemized list that will hold up under scrutiny.

DeductAble can be a lifesaver here. It helps you log each item, assign a condition, and find an appropriate value, making sure your records are complete and organized from the get-go. It turns a chore into a simple, manageable process.

How to Value Common Clothing Items You Donate

Moving from the abstract idea of “Fair Market Value” to putting a real number on that old pair of jeans can feel like a massive jump. How do you stop guessing and start using a consistent, defensible method?

It all comes down to creating clear condition categories and understanding the realistic value ranges for everyday clothing. This approach turns a confusing chore into a simple, repeatable process.

First, you need to become an objective inspector of your own clothes. Before you even think about the price, sort every single item into one of three buckets based on its condition. This framework is the foundation for every clothing donation value you’ll calculate.

  • Good Condition: The item is gently used and definitely shows signs of wear. Think minor fading, a bit of pilling on a sweater, or a shirt that has softened up from many washes. It’s still completely wearable with life left in it, but it’s not fresh off the rack.
  • Very Good Condition: This item has only been worn a handful of times and is in great shape. It has no visible flaws like stains, tears, or holes, and the fabric and color are still crisp. To a casual observer, it looks almost new.
  • Excellent / Like New: An item in this category is pristine. It might have been worn just once or not at all, and it could still have the original tags attached (often abbreviated as NWT, or “New With Tags”). There are zero signs of wear.

This simple three-tiered system gives you a logical starting point. A basic t-shirt in “Good” condition will naturally have a different value than the exact same shirt in “Excellent” condition. Having this structure makes it easy to justify your reasoning later on.

Putting Numbers to Your Items

Once you’ve sorted everything by condition, you can start assigning dollar values. Remember, you’re not using the original retail price. You’re estimating what a shopper would realistically pay for that item in a secondhand store today.

Of course, the brand plays a huge role here. A well-known designer handbag will hold its value far better than a generic t-shirt, regardless of its condition.

This infographic breaks down the key factors that influence an item’s final Fair Market Value.

Infographic about clothing donation value

As you can see, an item’s brand, age, and condition all work together to determine its real-world worth in the secondhand market.

To give you a better feel for this, here are some common items and their typical Fair Market Value ranges. Think of this not as a rigid formula, but as a reliable guide to help you make consistent valuations. Many charities, like Goodwill, provide similar guides that are a fantastic resource. For a deeper dive, check out our Goodwill donation value guide, which offers even more detailed examples.

Sample Clothing Donation Value Ranges by Condition

This table gives you a solid idea of the estimated Fair Market Value for common clothing items, broken down by their condition.

Item Good Condition Very Good Condition Excellent / NWT
Men’s Jeans (Brand Name) $7 – $15 $16 – $25 $26 – $40
Women’s Blouse (Standard) $3 – $6 $7 – $12 $13 – $20
Winter Coat (Heavy) $10 – $25 $26 – $45 $46 – $75+
Children’s T-Shirt $1 – $3 $4 – $6 $7 – $10
Designer Handbag $25 – $75 $76 – $200 $201 – $500+

As you can see, the value can swing dramatically. A standard winter coat in good, usable shape might be worth $15, but a like-new one from a premium brand could easily be valued at $75 or more. These ranges help anchor your estimates in reality.

A Practical and Defensible Approach

The whole point is to create a system that is both fair and easy to defend if the IRS ever asks. The classic way to do this is by creating a spreadsheet with columns for the item, brand, condition, and your final value. It works.

But let’s be honest—logging dozens or even hundreds of items one by one can become incredibly tedious.

This is exactly where modern tools come in. DeductAble lets you quickly log each item, select its condition, and find an appropriate value, all while building the itemized list the IRS requires. It completely removes the painful data entry and helps ensure your valuations are consistent and well-documented.

Ultimately, the best method for determining clothing donation value is one you can apply consistently to every single item. Whether it’s a pair of socks or a designer suit, a structured approach gives you the confidence that your final deduction is accurate and well-supported.

By taking a few extra minutes to inspect, categorize, and value each piece of clothing, you transform a pile of donations into a well-supported financial document. That diligence not only maximizes your tax benefit but also provides a clear, logical record of your charitable giving.

Creating Your Well-Supported Donation Records

A strong tax deduction for your donated clothing needs an even stronger paper trail. While figuring out the fair market value is a huge part of the puzzle, it’s the quality of your documentation that ultimately proves your claim to the IRS. Without the right records, even the most accurate valuations won’t hold up under scrutiny.

Think of it as building a case. Your valuation is the argument, but your records are the hard evidence. The IRS has specific rules that get stricter as the total value of your non-cash donations climbs throughout the year. Knowing these thresholds is the key to creating a file that’s ready for anything.

These aren’t just friendly suggestions—they’re firm requirements. If you miss a step, your entire deduction could be disallowed. That’s a frustrating and completely avoidable outcome.

Records for Donations Under $250

For any single donation trip where the total value is less than $250, the rules are pretty straightforward but non-negotiable. You must get a receipt from the charity for each and every drop-off. A bank statement or canceled check just doesn’t cut it for non-cash items like clothes.

Your receipt needs to have a few key details:

  • The name of the charitable organization.
  • The date and location where you made the donation.
  • A decent description of what you gave (e.g., “one bag of men’s clothing,” “two boxes of children’s toys and clothes”).

The charity won’t put a value on the receipt—that part is up to you—but this document is your primary proof of the donation itself.

Documentation for Donations Between $250 and $500

Once the value of a single donation trip hits $250 (but stays under $500), the paperwork gets more serious. On top of the standard receipt, you now need a contemporaneous written acknowledgment from the charity.

This is a formal document that must state whether you received anything in return for your donation. If you got nothing, it needs to say that explicitly. This is a critical piece of evidence the IRS looks for.

This rule applies on a per-donation basis, not per year. So if you drop off two bags of clothes you’ve valued at $300, you need this specific acknowledgment for that one contribution.

Navigating Donations Valued Over $500

When your total non-cash donations for the year add up to more than $500, you’ve crossed a major IRS threshold. At this point, you’re required to file Form 8283, Noncash Charitable Contributions, with your tax return. This form isn’t just a summary; it demands a detailed, itemized list of what you donated, including each item’s condition and fair market value.

This is exactly where disorganized donors get into trouble. A vague receipt that just says “3 bags of clothing” won’t be enough to fill out Form 8283 correctly. You need to know what was in those bags—every shirt, pair of pants, and jacket.

Taking a quick photo of your items before you donate provides powerful visual proof of their existence and condition, which is a fantastic way to back up your itemized list. Keeping everything organized is absolutely essential here.

The impact of these donations goes far beyond your tax return, by the way. In the United States, clothing donation is a massive force for good, keeping millions of tons of textiles out of landfills. For instance, Goodwill alone handled around 107 million donations in 2021, which kept about 3.8 billion pounds of used goods from being trashed across North America.

Common Pitfalls That Can Cost You Your Deduction

Knowing the rules is half the battle. Knowing what not to do? That’s what keeps your hard-earned tax deduction safe.

Even with the best of intentions, a few simple mistakes can unravel all the work you’ve put into documenting your clothing donation value. Let’s walk through the most common blunders so you can sidestep them and build a well-supported record.

Mistake #1: Overvaluing Your Donations

This is, by far, the most frequent error. It’s so easy to remember the $125 you paid for those designer jeans, but that price tag is totally irrelevant to the IRS. Your deduction is based on Fair Market Value—what someone would pay for them today. Claiming the original retail price is a massive red flag.

Another trap is sentimental value. That jacket from a memorable trip might feel priceless to you, but its tax value is strictly about its condition and brand, not your memories. You have to stay objective to land on a number you can defend.

Mistake #2: Disorganized and Incomplete Records

A messy paper trail is perhaps the most damaging mistake of all. A vague, crumpled receipt with a single number like “$200” scribbled on it is practically an invitation for an audit. If you can’t produce a detailed list of what was actually in those bags, you have no real way to back up your claim.

Here’s where people usually drop the ball:

  • Failing to Itemize: For donations over $500, an itemized list isn’t just a good idea—it’s a requirement for filing Form 8283. No list, no deduction.
  • Forgetting Photos: A picture is worth a thousand words, especially to an auditor. Photos provide powerful, visual proof of your items’ existence and condition, reinforcing your valuation.
  • Losing Receipts: You absolutely must have a dated receipt from the qualified charity for every single donation, no matter how small.

Think of it this way: your deduction is only as strong as the records that support it. In an audit, sloppy records are a losing argument.

Mistake #3: Technical and Procedural Gaffes

Beyond valuation and records, a few procedural slip-ups can also invalidate your deduction. These might seem like minor technicalities, but the IRS takes them seriously.

First, make sure you’re donating to a qualified 501(c)(3) organization. Your generous gift to a neighbor, a political campaign, or a for-profit thrift store won’t count for a tax deduction. If you’re ever unsure, just double-check the charity’s status using the IRS’s official Tax Exempt Organization Search tool.

Second, don’t forget to file the right paperwork. If your total non-cash donations for the year top $500, you must attach Form 8283 to your tax return. Forgetting this form is a surefire way to get your deduction disallowed.

By steering clear of these common errors, you protect your deduction and ensure your generosity is properly rewarded.

Your Step-by-Step Donation and Deduction Plan

Alright, let’s put all that theory into action. Following a clear game plan can turn the messy job of donating clothes into a smooth process that gets you the biggest possible deduction come tax season. This checklist breaks down the whole journey, from sorting your closet to filing your return.

Think of it as your donation workflow. Each step builds on the last, giving you a rock-solid foundation for a tax deduction that can stand up to scrutiny.

Step 1: Sort and Inspect Every Item

First things first: you need to play inspector. Go through your items one by one and be brutally honest about their condition. Pull out anything that doesn’t meet the IRS’s “good used condition or better” rule. That means anything with stubborn stains, rips, or broken zippers gets set aside for textile recycling, not the donation pile.

This initial sort is non-negotiable. It makes sure every single item you log for a deduction is legit. It’s also a great chance to group similar things together, which will make the next few steps a lot quicker.

Step 2: Create a Detailed Inventory

Once you have your stack of donation-worthy items, it’s time to make your master list. A simple spreadsheet can work, but DeductAble is built to make this part painless. For each piece of clothing, you’ll want to note:

  • Item Type: (e.g., “Men’s Dress Shirt,” “Women’s Jeans”)
  • Brand: (e.g., “Banana Republic,” “Levi’s”)
  • Condition: (e.g., “Good,” “Very Good,” “Excellent/NWT”)

An itemized list is an absolute must if your total non-cash donations for the year top $500, since you’ll need it to fill out Form 8283. Honestly, getting into this habit now, no matter the value, is just a smart move.

Step 3: Assign a Fair Market Value

With your inventory ready, it’s time to assign a realistic Fair Market Value (FMV) to each item based on its brand and condition. Look back at the valuation guides and be consistent. Remember, the FMV isn’t what you paid for it—it’s what a shopper would realistically pay for it in a thrift store today.

This is where your careful record-keeping really pays off. A well-documented FMV for each individual item is way more credible than a single, guesstimated number for a whole bag of clothes.

Step 4: Photograph Your Items for Proof

Before you bag everything up, snap a few photos. You don’t need a professional photo shoot. Just get some clear pictures of your items to provide powerful visual proof of what you donated and what condition it was in. Group shots of similar items (like a pile of ten kids’ t-shirts) are totally fine and serve as excellent backup for your records.

Step 5: Donate and Get the Right Receipt

Now you’re ready to make the drop-off. Choose a qualified 501(c)(3) charity and—this is crucial—get a dated receipt right then and there. Make sure the charity’s name and address are on it. That simple piece of paper is your primary proof that the donation actually happened.

It’s pretty cool to see how even the collection process is getting smarter. Initiatives like Goodwill’s Clothing Collection Innovation Program are using smart bins with sensors to alert staff when they’re full. This has reportedly boosted collections by 30% and cut down on messy overflow, making sure more donations get where they need to go. You can read more about these global clothing donation trends to see how tech is changing the game.

Step 6: Compile and File Your Documentation

Last step: bring it all together. Scan your receipt or snap a photo of it, then store it digitally with your itemized list and pictures. When tax time rolls around, you’ll have a complete package to report your deduction accurately and fill out Form 8283 if you need to.

Your Top Questions About Donating Clothes, Answered

Even after you’ve sorted your piles and found a charity, a few tricky questions always seem to pop up. Let’s clear up some of the most common ones so you can donate with total confidence.

Can I Deduct Clothes That Are New With Tags?

You absolutely can, and they’ll almost always be worth more than similar used items. Just remember, you can’t claim the full price you paid at the store. The value is based on what someone would realistically pay for that brand-new item in a thrift or consignment shop—which is always a step down from the original retail price.

Make sure to note the “new with tags” (NWT) status in your records and snap a few photos. This gives you solid proof to justify a higher valuation within the secondhand market.

What Happens if My Non-Cash Donations Go Over $500?

This is a big one. Once the total value of all your non-cash donations (clothes, furniture, books—everything) crosses the $500 mark for the year, the IRS requires you to file an extra form with your taxes: Form 8283, Noncash Charitable Contributions.

Don’t skip this step. Forgetting to file Form 8283 when your non-cash donations top $500 is a surefire way to have your entire deduction for those items denied by the IRS.

DeductAble really shines here. It keeps all your itemized records neatly organized, so when it’s time to fill out that form, you’re not digging through a shoebox of receipts and trying to remember what you gave away back in March.

Do I Really Need a Receipt for Every Single Donation?

Yes, this is completely non-negotiable. The IRS wants to see a receipt from a qualified charity for every single time you donate, no matter how small the drop-off. If you visit Goodwill three times this year, you need three separate, dated receipts.

Think of these receipts as your primary evidence. They are the official proof that you actually made a donation on a specific date. Without them, you have nothing to back up your claim if the IRS ever asks.


Ready to stop guessing and start tracking your donations with confidence? DeductAble makes it easy to create itemized, well-supported records of your charitable giving, ensuring you get the maximum tax deduction you deserve. Get started today and see how simple it can be.

Itemized Deduction vs Standard Deduction: Which Saves You More on Taxes?

When it’s time to file your taxes, one of the biggest decisions you’ll make boils down to a simple question: which deduction method will save you the most money? On one hand, you have the standard deduction—a fixed, no-questions-asked dollar amount set by the government that instantly reduces your taxable income. On the other, you have itemized deductions, where you can tally up specific, eligible expenses to subtract instead.

The logic is straightforward: if your total itemized deductions add up to more than the standard deduction for your filing status, you should itemize. For many, the key to unlocking those savings lies in an often-overlooked area: charitable donations.

Understanding Your Deduction Options

Think of it as choosing between two paths. One is simple and direct, while the other requires a bit more effort but can lead to a much bigger tax break. The goal for either path is the same: to legally lower your adjusted gross income (AGI) as much as possible, which in turn shrinks your final tax bill.

A person using a calculator to review financial documents for tax purposes.

Standard Deduction vs. Itemized Deduction at a Glance

To make sense of the core differences quickly, here’s a simple breakdown of how the two methods stack up against each other.

Feature Standard Deduction Itemized Deductions
Simplicity High. It’s a fixed amount based on your filing status. No math required. Lower. You need to track specific expenses and have the docs to prove it.
Record-Keeping Minimal to none. Extensive. Get ready to save receipts, statements, and detailed records.
Potential Savings Fixed and predictable. You know exactly what you’re getting. Can be much higher if your eligible expenses exceed the standard amount.
Who Benefits Taxpayers with simpler finances, renters, or those with few deductible costs. Homeowners, high-earners in high-tax states, and those who give generously to charity.

This table gives you a great starting point, but the real story is in how tax law has changed the game for millions of Americans.

The Impact of Tax Law Changes

The Tax Cuts and Jobs Act (TCJA) of 2017 completely reshaped this decision. By nearly doubling the standard deduction amounts, the law made it the better financial choice for a huge portion of the population. The change was so significant that the percentage of taxpayers who itemize plummeted from around 30% before the TCJA to less than 10% today. You can read more about how the TCJA impacted tax deductions on the Tax Policy Center’s website.

For many, this shift means taking the standard deduction is a no-brainer—it offers a bigger tax break without the headache of tracking every last expense.

But for those with significant costs like mortgage interest, high state and local taxes, or substantial charitable donations, itemizing is still a powerful financial strategy. This is where maximizing every possible deduction—especially from charitable giving—becomes critical. DeductAble is invaluable here, helping you accurately value and document every non-cash donation to ensure you clear the high bar set by the standard deduction and get the tax break you deserve for your generosity.

Understanding the Standard Deduction

Think of the standard deduction as the tax system’s simplest off-ramp. It’s a fixed dollar amount, set by the IRS and based on your filing status, that you can subtract right off your income. No receipts, no math, no fuss.

This straightforward approach is designed to make tax filing easier for millions of Americans, offering a clear path to tax savings without the headache of tracking every last deductible expense.

Instead of meticulously adding up mortgage interest, state taxes, and charitable gifts, you just claim the single amount designated for your situation. The IRS even adjusts these amounts for inflation each year, so they stay relevant.

Who Benefits Most from the Standard Deduction

This method is a perfect fit for people with straightforward financial lives. If you don’t have a mountain of deductible expenses, taking the standard deduction isn’t just easier—it’s usually the smarter financial move.

You’ll probably find the standard deduction is your best bet if you are:

  • A renter without any mortgage interest to write off.
  • Someone with few major expenses, like high medical bills or large charitable donations.
  • A taxpayer who values simplicity and less paperwork more than chasing every last dollar.
  • Living in a state with low or no state income tax, which means your State and Local Tax (SALT) deduction wouldn’t be very high anyway.

In short, if you add up all your potential itemized expenses and the total doesn’t even come close to the standard deduction, this is your path. It’s clean, simple, and efficient.

Standard Deduction Amounts for 2024

The IRS lays out specific standard deduction amounts based on how you file. For the 2024 tax year (the return you’ll file in 2025), here are the numbers to know:

  • Single: $14,600
  • Married Filing Jointly: $29,200
  • Married Filing Separately: $14,600
  • Head of Household: $21,900

It’s also worth noting there’s an extra boost for taxpayers who are age 65 or older, or who are blind. This additional amount—$1,550 for married folks or $1,950 for singles in 2024—gets tacked right onto your standard deduction, further lowering what you owe.

While this option is almost universal, there are a few specific situations where you can’t take it. For example, if you’re married but file separately and your spouse decides to itemize their deductions, you’re not allowed to take the standard deduction. It’s always smart to double-check your eligibility before you lock in your choice.

A Look at Common Itemized Deductions

So, you’ve crunched the numbers and realized your potential deductions might just beat the standard amount. What now? It’s time to start itemizing. This is where you get to subtract specific, eligible expenses from your income, which often leads to some serious tax savings.

Let’s break down the most common write-offs that help people cross that threshold.

The choice between the standard deduction and itemizing is a big deal for your bottom line. Since the TCJA nearly doubled the standard deduction, only about 10% of taxpayers now itemize. That’s why understanding every potential deduction—especially those from your charitable giving—is so critical to making the right choice. The IRS offers some great insights on the difference between the two.

Mortgage Interest and State Taxes

For homeowners, the mortgage interest deduction is often the MVP of their tax return. It’s usually the single biggest reason people choose to itemize. You can typically deduct the interest you paid on up to $750,000 of mortgage debt used to buy, build, or significantly improve your primary home (or even a second one). This deduction alone can get you pretty close to the standard deduction amount.

Another major player is the State and Local Tax (SALT) deduction. This lets you write off your property taxes plus either your state income taxes or your state sales taxes. But—and this is a big but—the SALT deduction is currently capped at $10,000 per household, per year.

Significant Medical Expenses

The medical expense deduction has a pretty high bar to clear, but if you have a year with major health costs, it can provide huge relief. Here’s the catch: you can only deduct unreimbursed medical expenses that exceed 7.5% of your adjusted gross income (AGI). This includes things like doctor visits, hospital bills, prescriptions, and even the miles you drive for medical appointments.

Charitable Contributions: The Deduction That Tips the Scales

This is the one people so often underestimate. For many taxpayers, charitable giving is the key that unlocks the benefits of itemizing. This deduction goes way beyond the cash you hand over; it also includes the fair market value of all the goods you donate—the clothing, furniture, and household items you drop off at qualified charities.

A lot of taxpayers leave money on the table by either guessing at the value of their non-cash donations or forgetting to track them altogether. Every bag of clothes or box of old electronics has a value that pushes you closer to beating the standard deduction.

This is where being meticulous about your generosity really pays off. All those small non-cash donations can add up faster than you think. And if you donate a big-ticket item? That can be a game-changer. For a deeper dive, check out our guide on donating your car to charity.

The real challenge is figuring out an accurate, defensible value for every single item you give away. Guesswork isn’t just a bad habit; it can lead to inaccurate filings and missed savings. This is exactly why tools built for donation tracking, like DeductAble, are so essential.

How to Choose the Right Deduction Method

Deciding between the standard and itemized deduction really comes down to one simple question: do your individual deductible expenses add up to more than the standard deduction for your filing status? If they do, you itemize. If not, you stick with the standard. It’s that straightforward.

Think of it as a financial scavenger hunt. The first step is to round up all your potential write-offs and see what they’re worth. You might be surprised by how quickly they add up.

Calculating Your Potential Itemized Deductions

Before you can make the call, you need a solid estimate of what you can actually claim. Here’s a quick rundown of the big-ticket items to look for:

  • Mortgage Interest: This is often the biggest deduction for homeowners. Find the total on the Form 1098 your lender sends you.
  • State and Local Taxes (SALT): This includes your property taxes plus either your state income taxes or your state sales taxes. Just remember, this one is capped at $10,000 per household.
  • Charitable Donations: Add up any cash you gave, but don’t forget the fair market value of all the stuff you donated. Clothes, old furniture, electronics—it all counts, and this is where people often leave a lot of money on the table.
  • Medical Expenses: You can only deduct out-of-pocket medical costs that exceed 7.5% of your Adjusted Gross Income (AGI). It’s a high bar, but for some, it makes a huge difference.

Once you’ve got these numbers, add them all up. That final figure is what you’ll compare against the standard deduction to see which option puts more money back in your pocket.

This decision tree gives you a clean visual for figuring out which path to take.

Infographic about itemized deduction vs standard deduction

It boils the choice down to a single calculation: if your tracked expenses are higher than the government’s fixed amount, it’s time to itemize.

The best choice really depends on your specific financial situation. Here’s a quick guide to see which profile you might fit into.

Who Typically Benefits From Each Deduction Method

Taxpayer Profile Likely Best Choice Primary Reason
New Homeowners Itemized High mortgage interest and property taxes often exceed the standard deduction.
Renters in Low-Tax States Standard Without mortgage interest or significant state taxes, it’s tough to beat the standard.
High Earners in High-Tax States Itemized Even with the $10,000 SALT cap, mortgage interest and large charitable gifts can push them over.
Generous Givers Itemized Significant cash and non-cash charitable donations can easily surpass the threshold.
Retirees with Paid-Off Homes Standard No mortgage interest means their largest potential deduction is gone.
Those with High Medical Bills Itemized If out-of-pocket costs exceed the 7.5% AGI floor, this can be a massive deduction.

Ultimately, you have to run the numbers for yourself. What works for one person might not work for another, even if their lives look similar on the surface.

Real-World Scenarios

Let’s see how this plays out for a couple of different taxpayers.

Scenario 1: The New Homeowner

  • Profile: A married couple, filing jointly. They just bought a house and paid $20,000 in mortgage interest. They also hit the $10,000 SALT cap with their property and state income taxes. On top of that, they donated $2,000 worth of cash and goods.
  • Calculation: $20,000 (mortgage) + $10,000 (SALT) + $2,000 (charity) = $32,000 in itemized deductions.
  • Decision: Their $32,000 total easily beats the $29,200 standard deduction for married couples. They should absolutely itemize.

Scenario 2: The Generous Retiree

  • Profile: A single filer who is retired. Her house is paid off, but she had $9,000 in medical bills on an AGI of $60,000. Her SALT adds up to $4,000, and she’s a very active donor, giving $5,000 in non-cash items to her favorite charity.
  • Calculation: First, her medical deduction is only the amount over 7.5% of her AGI, so $9,000 – ($60,000 * 0.075) = $9,000 – $4,500 = $4,500. Add it all up: $4,500 (medical) + $4,000 (SALT) + $5,000 (charity) = $13,500.
  • Decision: Her $13,500 total is less than the $14,600 standard deduction for a single filer. She’s better off taking the standard deduction.

These examples show just how personal the decision is. For those who give a lot to charity, getting the value of non-cash donations right is critical. Using an app like DeductAble ensures every donated item is valued correctly according to IRS guidelines, helping you capture every last dollar and possibly tipping the scales in favor of itemizing.

Maximizing Donations to Tip the Scales for Itemizing

When you’re hovering right on the edge of that itemization threshold, every single dollar counts. For a lot of taxpayers, the secret to finally pushing past the standard deduction isn’t buried in mortgage interest or state taxes. It’s often hiding in their charitable giving—specifically, the non-cash donations that so many of us forget to track.

Think about it. Every bag of clothes, every box of old toys, or that piece of furniture you dropped off at Goodwill has a fair market value. On their own, these values might not seem like much, but they add up surprisingly fast. Failing to accurately track and value these items is a huge missed opportunity to lower your tax bill.

Capturing the True Value of Your Generosity

The biggest headache with non-cash donations is figuring out what they’re actually worth in a way the IRS will accept. Guessing is a terrible strategy. It can lead you to under-claim your deduction or, even worse, raise red flags with the IRS. This uncertainty is why so many people just undervalue their stuff or don’t bother claiming it at all.

This is exactly where a little bit of tech can make a massive difference. Instead of pulling numbers out of thin air, you can use a tool built for this exact job.

By using DeductAble’s extensive database of fair market values, you can instantly see what your donations are worth. It gives you the confidence that you’re claiming the maximum legal amount without the guesswork.

Documentation Rules for Charitable Gifts

Whether you give cash or goods, the IRS wants to see proof. The kind of documentation you need really depends on the type and value of your donation.

  • For any cash donation: You’ll need a bank record (like a canceled check or credit card statement) or a written receipt from the charity.
  • For non-cash donations under $250: A receipt from the charity showing its name, the date, and a description of the items is a must.
  • For non-cash donations between $250 and $500: You need a “contemporaneous written acknowledgment” from the organization that gets into the details of what you gave.
  • For non-cash donations over $500: On top of the receipt, you have to fill out and file Form 8283, Noncash Charitable Contributions, with your tax return.

The record-keeping can feel like a pain, but it’s absolutely non-negotiable if you want to claim the deduction. This is another spot where using a dedicated donation tracker pays for itself by keeping all your receipts and valuations organized in one place.

Ultimately, maximizing this deduction just comes down to being diligent. By carefully tracking both your cash and non-cash gifts, you turn your generosity into a powerful tool that can make the itemized deduction vs standard deduction decision a whole lot clearer. To get into the nitty-gritty, you can learn more about what donations are tax deductible and make sure you’re not leaving money on the table.

When your giving is properly documented, it can easily provide that final push you need to get over the standard deduction hump and unlock some serious tax savings.

Frequently Asked Questions About Tax Deductions

Figuring out whether to itemize or take the standard deduction can bring up a lot of questions. Here are some quick, clear answers to the most common ones we hear, designed to help you file with a lot more confidence.

Can I Switch Between Standard and Itemized Deductions Each Year?

Yes, you absolutely can—and you should. The best choice is tied directly to your financial picture for that specific year, which can change in a big way from one tax season to the next. You’re never locked into the method you used on a previous return.

For example, you might take the standard deduction one year as a renter. But if you buy a home the following year, you suddenly have mortgage interest and property taxes to account for. In that scenario, itemizing could easily become the smarter move. It’s always worth re-evaluating where you stand each year.

What Records Do I Need to Keep if I Itemize?

If you decide to itemize, think of meticulous record-keeping as non-negotiable. The IRS requires you to be able to back up every single deduction you claim in the event of an audit.

Here are the essential documents to hang onto:

  • Mortgage Interest Statements (Form 1098) from your lender.
  • Property tax records from your local government.
  • Receipts and bank statements for any cash-based charitable contributions.
  • Detailed records for non-cash donations, which must include a list of items, their condition, their fair market value, and an official receipt from the charity.

Getting the documentation right for non-cash gifts is critical. You can learn more about the specifics in our guide on understanding Goodwill donation receipts.

Does My State Have Its Own Standard Deduction?

Most states with an income tax do have their own standard deduction, but the rules and amounts often look different from the federal guidelines. It’s pretty common for a state’s standard deduction to be a lot lower than the federal amount.

This can create a situation where you take the standard deduction on your federal return but find it’s better to itemize on your state tax return. Always check the specific tax laws for your state. Your best federal choice isn’t automatically your best state choice, and you don’t want to leave local savings on the table.


Ready to stop guessing and start maximizing your non-cash donation deductions? DeductAble uses AI to classify and value your donated goods accurately, creates year-end reports, and stores all your records securely. Turn your spring cleaning into significant tax savings. Download the app today at https://deductable.ai.

Goodwill Donation Value Guide to Maximize Your Tax Return

That box of stuff you’re donating to Goodwill does more than just clear out your closet—it can be a serious boost to your tax refund. But what are those used items actually worth?

The short answer is their fair market value, which is just a fancy way of saying what someone would realistically pay for them today. Think of it as the price tag you’d see on a similar item hanging on a rack at a thrift store.

Turning Your Donations Into Valuable Tax Deductions

A person holding a cardboard box filled with items for donation to Goodwill.

Decluttering your home feels great on its own, but the rewards don’t have to stop there. Every bag of clothes, box of books, or old end table you give to a qualified charity like Goodwill can translate into a valuable tax deduction. This guide will give you the know-how to turn your generosity into real financial savings.

The key to unlocking this benefit is getting a handle on how to value your donated items according to IRS rules. It might sound intimidating, but it’s actually pretty straightforward once you know the basics. It’s not about what you originally paid for an item, but what it’s worth in its current condition right now.

The Power of Philanthropy

This simple act of giving is part of a much bigger story. The culture of giving in the United States is incredibly strong, making up a huge piece of global charitable donations. The global charitable giving market was valued at around $500 billion in 2023 and is only expected to grow. You can dive deeper into these global giving trends to see how your individual contributions fit into a worldwide movement.

By learning to accurately document your donations, you’re not just helping yourself at tax time; you’re participating in a powerful cycle of community support. Your donated goods generate revenue that funds job training, employment placement services, and other vital local programs.

The core principle is simple: An accurate valuation ensures you get the full tax benefit you’re entitled to, while solid documentation provides the proof the IRS requires. Mastering this turns a simple act of charity into a smart financial decision.

Why This Goodwill Donation Value Guide Matters

So many people either skip the deduction entirely because it seems too complicated or just guess at the values, potentially leaving hundreds of dollars on the table. This guide is here to wipe away that uncertainty. We’ll break down the entire process into simple, manageable steps, covering everything from figuring out fair market value to keeping impeccable records.

Here’s a quick look at what you’ll get from this guide:

  • Clear Understanding: You’ll learn exactly what the IRS means by “fair market value” and how to apply it to your stuff.
  • Actionable Steps: We’ll give you a step-by-step workflow for assessing, documenting, and valuing everything you donate.
  • Confidence at Tax Time: You’ll know how to create the records needed to back up your deductions, sidestepping common mistakes that can attract IRS scrutiny.

With the right approach, you can maximize your tax return with total confidence. By the time you finish this guide, you’ll be ready to turn every donation into a documented, defensible, and financially rewarding part of your tax-filing strategy.

So What’s This “Fair Market Value” Thing Anyway?

To get the biggest tax benefit from your generosity, you have to get cozy with a term the IRS loves: Fair Market Value (FMV). This isn’t some arbitrary number you pull out of thin air; it’s the official standard for valuing every non-cash item you donate. But what does it actually mean in the real world?

Let’s put it this way: imagine you’re wandering through a local thrift store. You spot a cool leather jacket on the rack. The price tag on it isn’t what the original owner paid at the mall five years ago. It’s what someone like you would be willing to pay for it right now, in its current, gently-loved condition.

That’s Fair Market Value in a nutshell.

It’s the realistic, present-day resale price of an item. It has nothing to do with the original sticker price or how much sentimental value it holds for you. That designer handbag you originally bought for $500 might only have an FMV of $75 today after a few years of use. Nailing this distinction is the key to valuing your donations correctly and keeping the IRS happy.

Condition Is Everything

When it comes to FMV, one factor rules them all: condition. An item that looks like it just came out of the box is always going to be worth more than something that’s seen better days. To keep your valuations honest and defensible, the IRS expects you to be realistic and assign a condition to each item.

Here’s a simple way to think about it:

  • Excellent (or Like New): You can’t find a single scuff, stain, or sign of wear. It might even have the original tags still attached. It could pass for new.
  • Good (or Gently Used): It shows minor signs of use—maybe a little fading or light wear—but there are no major flaws. This is where most of our donated stuff falls.
  • Fair: It’s got noticeable wear and tear, like pilling, a small stain, or other minor damage, but it still works and has life left in it.

An “Excellent” item might fetch 30-40% of its original price, while something in “Good” condition is more likely in the 10-20% range. This is exactly why a good goodwill donation value guide is so indispensable.

Here’s the golden rule: If you wouldn’t feel comfortable giving it to a friend or buying it yourself, you probably shouldn’t be donating it for a tax deduction. The goal is to give the charity something of value, not hand them a disposal problem.

What You Can—and Can’t—Deduct

Goodwill is known for accepting a huge variety of goods, but that doesn’t mean everything you drop off is tax-deductible. The IRS has a very clear rule: you can only deduct items that are in at least “Good” used condition or better. Keep this in mind as you’re sorting through your donation piles.

So, what’s generally off-limits for a deduction?

  • Broken or Busted Items: A toaster that won’t toast or a lamp with a chewed-up cord has no real Fair Market Value.
  • Seriously Damaged Goods: Clothing with huge rips, permanent stains, or a broken zipper usually doesn’t meet the “Good” condition standard.
  • Recalled for Safety: Old car seats, drop-side cribs, and other products that have been recalled can’t be resold, so their value is zero.
  • Hazardous Materials: Things like paint, harsh chemicals, or old car batteries are a no-go.

Taking a few minutes to sort your items before you head to the donation center saves everyone a headache. It also ensures your final itemized list is clean and compliant. This is where a modern tool can be a game-changer. DeductAble lets you snap a photo of each item, assign a condition, and log an IRS-compliant value on the spot. It creates a perfect digital trail as you go, eliminating the guesswork and the risk of accidentally including non-deductible items.

Your Practical Goodwill Donation Value Guide

A volunteer sorts through donated clothing in a well-lit Goodwill facility.

Alright, you understand what “Fair Market Value” is in theory. Now, let’s get down to brass tacks and turn that theory into actual dollar amounts.

Guessing is the fastest way to leave money on the table. But armed with a solid guide, you can confidently assign values to your donated items. This is where a practical goodwill donation value guide becomes your best friend.

Think of it less as an exact science and more as an educated estimate. A men’s dress shirt in good shape isn’t worth the same as one that’s brand new with tags still on, so value ranges are your key to accuracy. They give you a realistic low and high-end price, letting you place your item on that spectrum based on its actual condition and brand.

Goodwill Donation Value Ranges for Common Items

To make this easier, I’ve put together a table with some common fair market value ranges. Think of this as your starting point. Remember, these values assume the items are in at least “good” condition — clean, functional, and without major flaws.

Item Category Item Example Low Value (Good Condition) High Value (Excellent Condition)
Men’s Clothing Dress Shirt $4 $12
Jeans/Denim $5 $15
Suit (Jacket & Pants) $20 $75
Winter Coat $10 $40
Women’s Clothing Blouse or Top $3 $10
Dress (Casual) $6 $18
Jeans/Pants $5 $16
Jacket or Blazer $8 $25
Household Items Paperback Book $1 $3
Hardcover Book $2 $5
Coffee Maker $5 $15
Set of Dishes (4 settings) $10 $30
Microwave Oven $15 $40
Furniture End Table $15 $50
Dining Chair (each) $10 $35
Dresser/Chest $30 $120

These numbers reflect what a real shopper would reasonably pay for the item in a thrift store today. A high-end brand in pristine condition? Aim for the higher end of the range. A standard brand with minor, normal wear? That would fall closer to the low end.

Don’t Overlook the Small Stuff

It’s easy to focus on big-ticket items like furniture, but the small things add up fast.

A single box filled with kitchen gadgets, home décor, and a stack of books can easily be worth $50 to $100 or more in tax deductions when you take the time to itemize it properly.

As you can see, manually researching, tracking, and adding up these values for every single T-shirt, coffee mug, and side table can become a massive time sink. This is exactly the kind of tedious work that technology was born to solve.

The Smarter Way to Track Your Donations

Using valuation lists is a great starting point, but the process of creating a detailed, itemized list by hand is frankly a nightmare. Juggling paper lists, taking separate photos for your records, and looking up dozens of values is a chore nobody wants to do.

This is where DeductAble becomes your secret weapon. It completely removes the friction by rolling the entire process into a few quick taps on your phone.

You just snap a photo of an item, and the app’s AI-powered valuation engine instantly suggests an IRS-compliant Fair Market Value. You can tweak the condition and value if needed, creating a perfect, digital record in seconds flat.

For those who used to rely on tools like ItsDeductible, modern apps offer a far more powerful and seamless experience. You can check out our guide on finding the smarter alternative to ItsDeductible to see how new tech makes maximizing your deductions easier than ever before. It saves you hours of work and ensures your final report is accurate, turning a dreaded task into a genuinely rewarding one.

Getting Your Donation Paperwork Right for the IRS

A solid valuation is a great start, but it means nothing to the IRS without proof. Your Goodwill receipt is essential, but it’s only one piece of the puzzle. The law actually puts the responsibility on you, the donor, to create an itemized list of what you gave and its Fair Market Value.

Think of your Goodwill receipt as the anchor for your tax deduction. It proves you made a donation, where you made it, and on what date. But the IRS needs more than just a date-stamped slip of paper; they want a detailed breakdown of the actual items you donated.

This is where so many people accidentally leave money on the table. They hang onto the receipt but misplace the handwritten list of items—or worse, they never make one in the first place. Without that itemized proof, your deduction is on shaky ground if you’re ever questioned.

Understanding the IRS Documentation Tiers

The IRS has different documentation rules that get stricter as the total value of your non-cash donations goes up. The bigger your deduction, the more detailed your records need to be.

Here’s a simple breakdown of the thresholds you need to know:

  • Donations Under $250: For smaller drop-offs, a simple receipt from Goodwill is generally okay, as long as you also keep your own reliable written records of the items you gave.
  • Donations Between $250 and $500: Here, you need a “contemporaneous written acknowledgment” from the charity. This is your Goodwill receipt, and it must state whether you received anything in exchange for your donation. You still need your own itemized list to go with it.
  • Donations Over $500: This is a big step up. In addition to the receipt and your detailed list, you must fill out and file IRS Form 8283 (Noncash Charitable Contributions) with your tax return.
  • Donations Over $5,000: For high-value items or collections, the rules get even tighter. You’ll almost always need a qualified written appraisal from a professional.

Getting these rules right is non-negotiable for a compliant tax filing. Each tier demands a more robust level of record-keeping to satisfy the IRS.

Why Your Goodwill Receipt Is Only Half the Story

A standard Goodwill receipt confirms your donation, but it almost never lists the individual items you gave. It’s usually just a simple slip with the date and a staff signature. The IRS places the burden squarely on your shoulders to create and keep that detailed, itemized list of everything in those bags and boxes.

This list must include:

  1. A clear description of each item (e.g., “Men’s Levi’s 501 Jeans”).
  2. The item’s condition (“Good” or “Excellent”).
  3. The Fair Market Value you assigned to it.
  4. The date you made the donation.

The IRS requires you to create this itemized list, attach it to your receipt, and keep it with your tax records. A receipt alone isn’t enough for deductions over $250.

Trying to create this list from memory is a pain. You have to recall every single item, look up its value, and write it all down. This is where a modern tool can make a world of difference. An app like DeductAble becomes your digital record-keeper. As you pack your donations, you just snap photos. The app logs the items, suggests a value, and automatically creates the donation record for you. It seamlessly connects the “what” (your itemized list) with the “when and where” (your receipt), creating a complete package.

From Paper Chaos to Digital Confidence

Let’s be honest—keeping track of faded paper receipts and scribbled lists is a recipe for lost deductions. Imagine frantically searching for that crumpled receipt from last February when you’re doing your taxes a year later. It’s stressful, inefficient, and unnecessary.

A digital system solves this problem for good. By creating a time-stamped, photo-based record of every item, you build an unshakeable foundation for your tax deduction. There’s no more guesswork and no last-minute scramble for paperwork come tax season.

For a deeper dive into what your receipt should include and why it matters so much, you can learn more by understanding Goodwill donation receipts and how they fit into your overall tax strategy. This knowledge, paired with the right tools, empowers you to claim your deductions with total confidence, ensuring you get back every dollar you deserve.

Common Mistakes to Avoid When Valuing Donations

Getting the most out of your tax deduction isn’t just about knowing what your stuff is worth. It’s also about sidestepping the common slip-ups that can cost you money or, worse, attract unwanted attention from the IRS. A lot of well-meaning donors make small mistakes that can really slash their potential tax benefit.

The Sentimental Value Trap

This is one of the biggest and most common errors. It’s so easy to look at that designer dress you wore once to a wedding and remember the $300 you paid for it. But here’s the hard truth: the IRS doesn’t care about the original price tag or the happy memories attached to it. Your deduction is based strictly on its Fair Market Value right now—what a shopper would actually pay for it today in a thrift store.

This simple infographic breaks down the key IRS documentation rules you’ll want to keep in mind.

An infographic decision tree explaining IRS donation rules for different total donation values.

As you can see, the paperwork gets more serious as your donation total climbs. That makes getting the valuation and records right from the start even more important.

Overlooking Poor Condition

Another all-too-common mistake is donating items that are broken, stained, or just plain worn out, and then trying to claim a deduction for them. The IRS is crystal clear on this: you can only deduct items that are in “good used condition or better.” If an item is unusable, its Fair Market Value is zero. Simple as that.

Donating a broken toaster or a shirt with a giant, permanent stain doesn’t just mean you can’t claim it; it also creates a disposal headache for Goodwill. A good rule of thumb is: if you wouldn’t give it to a friend, you probably shouldn’t be claiming its value on your taxes.

Failing to Itemize and Document

Just dropping off bags and grabbing a blank receipt is a surefire way to lose your deduction. Sure, that receipt proves you made a donation, but it doesn’t prove what you donated. The IRS puts the responsibility squarely on you to create a detailed, itemized list of every single item, along with its condition and its value.

Forgetting this step is like doing all the work for a project but skipping the final presentation. Without an itemized list, your deduction is incredibly hard to defend if you’re ever questioned.

Key Takeaway: A blank receipt from Goodwill isn’t enough. It’s on you, the donor, to build and keep a detailed inventory of your donated items to back up your tax claim.

And here’s a pro tip: failing to take photos is a huge missed opportunity. A quick snapshot of a higher-value item provides undeniable proof of its existence and its condition when you donated it, which is the best backup you can have for your valuation.

Sidestepping Errors with a System

It’s easy to make these mistakes when you’re just relying on memory, scribbled notes, and a shoebox full of receipts. A structured, systematic approach is your best defense against leaving money on the table.

This is exactly where a dedicated tool can be a game-changer. DeductAble helps you avoid these common traps by design. It walks you through photographing each item, assigning a condition, and selecting an IRS-compliant value, creating a detailed, time-stamped log as you go.

Goodwill’s own growth highlights the power of the secondhand market, which is thriving as consumers seek value and sustainability. You can read more about how Goodwill is thriving in a tough retail world. This scale just goes to show how important accurate valuation is for the millions of donors powering it all. A good system makes sure your contribution is counted correctly—for them, and for you.

Putting It All Together: From Clutter to Deductions

Alright, let’s bring it all home. With a smart process, you can turn that pile of household clutter into a real financial win on your tax return. It’s time to stop leaving money on the table.

The secret isn’t complicated. It comes down to a few simple steps: list your items as you pack them, be honest about their fair market value using a good goodwill donation value guide, snap photos to prove their condition, and—always—get that signed receipt from the charity.

Your Final Checklist for Success

It might sound like a bit of a hassle, but a good system makes it incredibly straightforward. Think of it as a final quality check before you file, making sure you haven’t overlooked a single dollar you’re entitled to. Here’s how you can nail it every time:

  • Itemize Everything: Seriously, list every single item. Those books, kitchen gadgets, and forgotten clothes add up faster than you think.
  • Document the Condition: A quick photo of each item is your best friend. It provides undeniable proof of its condition when you donated it.
  • Assign a Fair Value: Use realistic value ranges to put a price on each item.
  • Get Your Receipt: Always walk away with a signed and dated receipt from Goodwill. This is your official proof.

When you follow a consistent process, you’re not just donating—you’re creating an audit-proof record. That means you can claim what you rightfully deserve with total confidence. No more guesswork, no more tax-time stress.

This methodical approach is especially critical for those big-ticket items, like a vehicle. For those larger donations, the IRS has some very specific rules you’ll want to follow. You can learn all about them in our detailed guide on donating your car to charity.

This is where DeductAble can turn a tedious chore into a rewarding financial move. It helps automate the valuation, keeps your donations organized, and builds the year-end reports for you. With it, you can be sure you’re getting every last deduction you’ve earned, easily and accurately.

A Few Final Questions, Answered

Even with the best system, a few specific questions always seem to pop up after the donation bags are dropped off. Here are some quick, clear answers to the most common ones I hear, so you can wrap up your donation process with total confidence.

How Long Should I Keep My Donation Records?

The official IRS rule of thumb is three years. That’s generally how long they have to look back and audit a tax return. So, at a bare minimum, you need to hang onto your Goodwill receipt and that detailed itemized list for at least that long.

Of course, keeping a shoebox full of paper for years is a recipe for disaster. Receipts fade, get lost in a move, or accidentally get tossed. This is exactly why switching to a digital record is such a game-changer.

Can I Still Claim a Deduction If I Lost the Receipt?

This is a tough spot to be in, and honestly, the answer is usually no. For any donation over $250, a signed and dated receipt from the charity is the single most important piece of evidence the IRS wants to see. If you get audited and can’t produce it, that deduction is almost certainly getting thrown out.

It’s a strict rule that really drives home how critical that little piece of paper is. It’s the official handshake that proves your gift was received. Protecting that receipt—whether it’s the physical copy or a quick digital photo of it—is non-negotiable for securing your tax deduction.

What if I Donate Something Worth Over $5,000?

This is where the rules get much more serious. If you’re donating something with significant value—think fine art, a piece of antique furniture, rare collectibles, or expensive jewelry—the standard valuation guides just won’t cut it.

For any single item (or a group of similar items, like a coin collection) valued at more than $5,000, you have to follow a specific, much stricter process.

Here’s what the IRS requires:

  1. Get a Formal Appraisal: You can’t just estimate the value yourself. You must hire a qualified, independent appraiser to provide a formal written appraisal.
  2. Complete Form 8283 (Section B): This is the big one. You, the appraiser, and the charity all have to sign off on Section B of IRS Form 8283, “Noncash Charitable Contributions.”

It’s an extra step, for sure, but it’s the only way the IRS will accept such a large deduction. It provides the expert verification they need, and for high-value donations, it’s absolutely mandatory.


Stop guessing and start maximizing. With DeductAble, you can confidently track every item, get IRS-compliant values, and build donation records in minutes. Download the app and turn your donations into the deductions you deserve: https://deductable.ai